
Laser Engraving: The Ultimate Guide for Beginners
Laser engraving revitalized the ancient art of engraving. What was once a slow, skill-intensive process, became quick and precise. Its accuracy made it a preferred choice across industries. Today, laser technology has advanced to the point where compact desktop laser engravers meet the demands of DIY enthusiasts.
If you’re new to the field of laser engraving, this guide is your starting point. We have covered the basics of laser engraving, how laser engravers work, the types of engraving machines, and how you can utilize laser engravers. Let’s get into the details!
In This Article
- What is Laser Engraving?
- How Does a Laser Engraver Work?
- Advantages of Laser Engraving
- Types of Laser Engraving Machines
- What Materials Can You Laser Engrave?
- What Materials Cannot be Laser Engraved?
- What Can You Do with a Laser Engraver?
- How to Use a Laser Engraver?
- How Much is a Laser Engraver?
- How to Choose a Laser Engraving Machine?
- Laser Engraving FAQs
What is Laser Engraving?
Laser engraving is a sophisticated process where a focused beam of light - monochromatic, coherent, and directional - interacts with a material’s surface. This interaction causes the material to evaporate or erode, creating a permanent mark or design. The precision of this beam is remarkable. With a spot size measured in micrometers, you achieve extremely accurate and detailed engravings.
The process is not only precise but also notably fast. Desktop laser engravers operate at speeds ranging from 300 to 600 mm/s, while more advanced models can reach speeds of 10,000 mm/s. This efficiency means that even complex designs can be engraved swiftly.
Another key advantage of laser engraving is its versatility with materials, which will be discussed in more detail later.
How Does a Laser Engraver Work?
A laser module is the heart of a laser machine. Inside that small enclosed box, resides a complex laser generation setup. This setup primarily has three things: gain medium, energy source, and mirrors.
The gain medium, which can be a gas, a crystal, or a liquid, plays a vital role. When exposed to light, the electrons in the gain medium become excited, leading to the release of photons. This light energy is supplied by an energy source, typically connected to a battery or an electric power source.
Surrounding the gain medium is the resonator, a configuration of mirrors designed to amplify the optical gain. These mirrors, along with various lenses, are tasked with directing and fine-tuning the laser beam, ensuring its precision and consistency. This setup creates a controlled, focused laser beam, essential for the detailed work.
The laser module of an engraver operates under the guidance of software, essentially the machine's brain. The movement of the laser module over the material, its power, and speed, everything is managed by the software.
The material to be engraved is placed on the work table i.e. base of the laser engraving machine. It is flat and non-reflective, designed such that the material on it stays firm on it during the engraving. Honeycomb panels can also be placed particularly for laser cutting to protect the table and improve heat dissipation.

Some laser engraving machines come with an air assist. It blows away the residual particles, keeping both the engravings and the laser lens clean. This is especially helpful during wood engraving where laser burn marks are common.

Process of Laser Engraving: From Digital Design to Physical Engraved Pattern
The laser engraving process starts with designing in graphic software. You create a pattern or drawing that you want to etch. This design is then exported to laser engraver software. Here, you adjust the settings for the material and finalize the design. The machine connects to your PC or mobile device, with the engraver software controlling it.

Once you start the process, the engraving begins. The laser beam, upon hitting the material, vaporizes a layer, leaving a mark. In some materials like metal alloys, this results in a colored pattern. This color change is due to a chemical reaction, often oxidation when the laser interacts with the metal's surface.
Advantages of Laser Engraving
Laser engraving is one of the most preferred processes in industries due to a wide range of benefits:
Quick, Precise, and Accurate
Laser engraving combines precision and accuracy with speed; a trait rare in traditional processes. You can design even the most intricate designs in minutes, thanks to its fine spot size and quick engraving speeds.

XTOOL F1
Fastest Portable Laser Engraver
With its max. engraving speed of 4,000mm/s and handheld design, f1 is perfect for on-site engraving projects.
Learn MoreVersatile Compatibility with Materials
Laser engraving is adaptable to various materials. It works effectively on both delicate (wood, leather, fabric) and hard materials (metals, acrylic, glass, stone). This makes the process suitable for a wide range of applications.
Customization
In the world of laser engraving, the only limit is your imagination. From bespoke gifts to tailor-made commercial products, it offers a canvas for creativity and personalization.
User Friendly
Laser engraving machines are designed with ease of use in mind. They require minimal training, with intuitive settings, and controls that are simple to navigate. Also, custom settings for different materials are readily available, which makes the process accessible to a wide range of users.
Reduced Waste
The accuracy of the laser means that the material is used efficiently, with minimal need for post-processing or corrections. This not only saves materials but also contributes to a more sustainable and cost-effective operation.
Safe Process
Most laser engravers are enclosed, which prevents any direct interaction with the laser during operation. Additionally, these machines come with multiple safety certifications, ensuring they are safe for frequent use.

XTOOL S1
Class 1 Safe Laser Engraver
Enclosed design. Safe and easy for home use. Ideal for both DIY and business projects.
Learn MoreTypes of Laser Engraving Machines
As mentioned earlier, lasers can have different types based on the gain medium they use. This gain medium also dictates the optical power of the laser. Commercially, these three types of laser engravers are common:
Fiber Laser Engravers
Fiber laser engravers are the type of solid-state laser with fiber optic as the gain medium. They have a wavelength between 780 nm to 2200 nm; it’s readily absorbed by most materials even metals. They are the most powerful laser engravers on the market. And are commonly used in metal engraving needs.

CO2 Laser Engravers
Their optical power can be as low as 40W and go up to hundreds of watts. Their wavelength is close to 10,600 nm. It is absorbed by most materials but reflected by metals. They are not the preferred choice for metals but excel at non-metals engraving and cutting.

Diode Laser Engravers
One of the lasers that is commonly used in desktop and hobby laser engravers. They may not be as powerful as CO2 or fiber lasers, yet they are compatible with a wide range of materials for engraving. Another benefit, they are largely less priced compared to the other two lasers.

What Materials Can You Laser Engrave?
Unlike traditional engraving methods, laser engraving is not designed for a single material, it works across a range of materials. Some popular materials that be laser cut and engraved are:
Wood

Laser engraving and wood are a perfect match. It works well with all types of wood, including hardwood, softwood, and plywood. You create unique wooden crafts like custom cutting boards, elegant nameplates, or eye-catching signboards. The natural grain of wood also adds a unique touch to each engraved piece.
Metal
Fiber and infrared laser engravers handle all types of metal, including stainless steel, copper, and brass. Whether you want to etch your metal keyrings, or tumblers, or just want things personalized, metal engraving lets you do all that.
Leather

Leather, known for its durability, is an excellent candidate for laser engraving. The laser delicately etches designs onto leather to create detailed and durable patterns. By laser engraving leather, you can add a sophisticated touch to items like belts, bags, and wallets.
Glass

Glass is another prime candidate for laser engraving. Glass laser engraving is often used for customizing items like wine glasses and perfume bottles. The laser etches delicate, precise designs, adding elegance and personalization. This technique is perfect for creating memorable gifts on glassware.
Acrylic

Acrylic, a versatile plastic, is well-suited for laser engraving. With the precision of the laser, you can create aesthetically pleasing items like jewelry, trophies, ornaments, wall art, and home décor items.
Paper
Paper engraving with a laser offers a unique way to stylize and personalize. It’s great for custom packaging design, decorative art, and even intricate model making. The laser precisely cuts and etches cardboard, allowing for detailed designs and text.
Rubber

Rubber, although a non-traditional choice, is another excellent candidate for laser engraving. By engraving rubber, you can make stamps, keychains, mats, personalized Apple Watch bands, and other custom rubber items. This technique works well with various rubber types, including natural, silicone, and synthetic rubber. However, due to the fumes produced during the process, proper ventilation is crucial for safety.
What Materials Cannot be Laser Engraved?
Laser engraving supports a wide array of materials. However, there are a few that are not recommended for engraving as they may catch fire and release harmful fumes. You need to be cautious with these materials:
- PVC (Poly Vinyl Chloride): Engraving PVC releases chlorine gas, which is both irritating and corrosive. It can damage your respiratory tract, skin, eyes, and even the laser machine itself.
- Coated Carbon Fiber: The coating on carbon fiber can release various toxic gases during laser engraving, posing health risks.
- Artificial Leather: Certain types of artificial leather contain Chromium (VI) or other harmful materials that can release toxic fumes when laser engraved.
- Materials Containing Halogens: Materials with halogens (like chlorine, fluorine, and bromine) can release harmful gases when engraved with a laser.
What Can You Do with a Laser Engraver?
A laser engraver is a versatile tool that unlocks a world of creative possibilities. Whether you’re an artist, a hobbyist, or a small business owner, the range of projects you can undertake is vast and varied. Think intricate patterns on jewelry, create unique artwork or personalized gifts for loved ones – the engraver is only limited by your imagination.
Artwork

Laser engraved painted canvas art
If you want to make art that stands out, then laser engraving is the most viable option. You can make canvas wall art, multi-layered pieces, detailed engravings on wood or acrylic, and even 3D textured art.
Jewelry Making

With laser engraving, you can add a personal touch to pre-made jewelry or even craft a personalized jewelry piece from scratch. Personalize pendants, rings, or bracelets with names, dates, or heartfelt messages. It is like whispering a secret into a piece of jewelry.
Home Décor

Want to spruce up your living space? Laser engraving can help. From creating unique wall hangings to custom coasters and photo frames, the creative possibilities are endless. In short, you can customize your décor to tell your story.
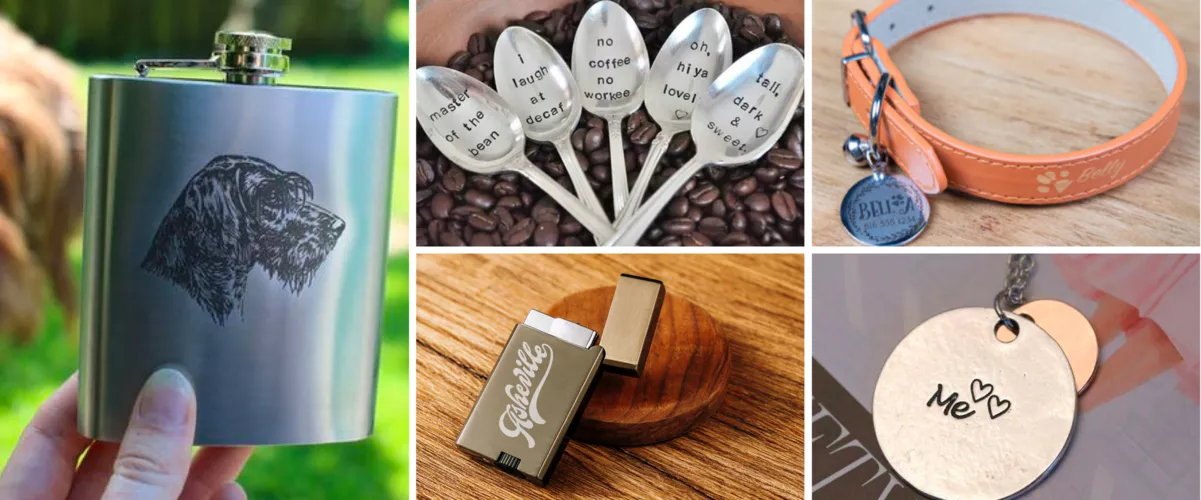
Personalized Gifts

If you’re thinking of sending personalized gifts to your loved ones or your coworkers. Then, try laser engraving. You can turn everyday items like tumblers, keychains, wine glasses, or cutting boards into special keepsakes. Imagine their delight, when people receive gifts that are specially crafted for them.
DIY and Craft Projects

For DIY enthusiasts looking for a new challenge, a laser engraver is a game-changer. It opens up a world of creative experiments, from custom home decor to unique art pieces. It is not just about making things; it’s about making them uniquely yours.
A Small Business

Laser engraving also has the potential to become a profitable venture. You can make personalized crafts like engraved keychains, notepads, and kitchen utensils, sell them online, and make money with a laser engraver.
If you're considering starting a laser engraving business, remember to research the best laser cutters and engravers. And for inspiration, check out lists of profitable laser engraving projects – they’re a goldmine of ideas for budding small businesses.
How to Use a Laser Engraver?
If you have recently bought a desktop laser engraver, here’s a generic process to use it for engraving:
1. Design Preparation
First, you need a digital design you want to engrave on the material. You can create this in laser design software such as Adobe Illustrator or CorelDRAW. Alternatively, you can also download the free laser engraving files from the Internet. Then import your design to the laser software.

2. Choosing the Material Settings
The laser control software has a setting for materials. You can optimize the machine's power and speed based on the materials. We recommend using the manufacturer-recommended setting. If you’re using any of the xTool machines, use these materials settings for successful laser engraving operation.
3. Adjusting the Laser Module
The last step is the correct design positioning and adjusting the focus of the laser head. Most machines have preview features that allow for easy design location and have auto-focus technology.
Safety Precautions for Use
Although laser machines come in enclosures, where there’s minimal chance of laser exposure. Still, to avoid any mishap during the operation process, follow these precautions:
- Ensure Adequate Ventilation: Laser engraving can produce harmful fumes, especially when working with plastics or coated materials. Use a fume extractor or smoke purifier to make sure the workspace is well-ventilated.
- Fire Safety: Never leave the laser engraver unattended while it’s operating, as there is always a risk of fire. Keep a fire extinguisher nearby, especially one suitable for electrical fires.
- Operate in a Safe Environment: Keep the area around the laser engraver clear of flammable materials and clutter. Also, ensure the engraver is placed on a stable, flat surface to avoid any accidental movements or tipping.
- Read the Manual: Familiarize yourself with the specific safety features. Learn what modules it has for emergency shutdown and in case fire erupts. Follow the recommendations of the manufacturer.
XTOOL S1
Class 1 Safe Laser Engraver
Enclosed design. Safe and easy for home use. Ideal for both DIY and business projects.
Learn MoreTips for Successful Laser Engraving
To get the best results, here are a few additional tips to follow:
- Use the Correct File Format: Understand the difference between raster and vector engraving. Raster images are best for detailed designs with gradients, while vector files are ideal for crisp lines and text. For 3D engraving, utilize grayscale in raster images to represent different engraving depths. Darker areas will be engraved deeper than lighter areas.
- Use Manufacturer-Defined Settings: Start with the manufacturer's recommended settings for your material, which are often well-tested. Plus, you may test-run the engraving on a sample material workpiece.
- Use an Air Assist: An air assist is worth it for laser engraving. It directs a stream of air at the engraving point, helping to reduce flare-ups and heat marks on the material. Especially, recommended for wood engraving where burnt marks are a common sight.
- Maintenance and Checks: Keep the machine clean, as built-up debris can be a fire hazard and can also affect the quality of your engravings. Also, inspect the laser module for any signs of wear. If anything is compromised, immediately replace it.
How Much is a Laser Engraver?
The price of a laser engraver can vary widely, ranging from $500 to $500,000. This reflects the diversity of laser engraving machines, from desktop models to commercial-grade machines.
- Desktop Engravers: These are more affordable, starting around $500, and can go up to $5,000. They are suitable for small businesses or personal use.
- Industrial Engravers: Prices for these start from $5,000 to $10,000 and can soar to several hundred thousand dollars. They are designed for heavy, continuous use and offer advanced features and larger working areas.
XTOOL S1
Best Desktop Laser Engraver for Beginners
Enclosed design. Safe and easy for home use. Ideal for both DIY and business projects.
Learn MoreHowever, the exact cost of these machines is dependent on a range of factors. We discussed that in a separate post on the cost of laser cutting machines. Here’s just a review of the factors:
Type of Laser
Fiber laser engravers are the most premium machines, designed for industrial use. Then, slightly less-priced are CO2 lasers. They too are used in industries, however, compact variants for small businesses and home usage are available. Diode lasers are the most cost-effective lasers in the market.
Optical Power
Optical power also dictates the price. More powerful lasers require advanced internal components, which adds more cost to the machine.
Working Area
The size of the laser engraver’s working area is directly proportional to its cost. Industrial machines with larger beds and robust moving parts are more expensive than smaller, desktop versions.
Add-Ons
Special features like interchangeable laser modules, built-in air assists, auto-focus capabilities, and enhanced safety measures add to the engraver’s functionality and safety but also increase its price.
How to Choose a Laser Engraving Machine?
If you’re looking to buy a new laser engraving machine. But are confused about where to start, here’s a list of technical aspects you need to look into before buying:
Optical Power
Determine the depth of engraving and cutting you need. More optical power is required for deeper engravings or cuts. However, optical power should not be confused with electrical power/machine-rated power.
Optical power is the energy you’re receiving at the end of the laser module, it’s mostly advertised in laser names. Let’s take the example xTool P2, it’s a 55W laser engraver i.e. its optical power is 55 watts.
Whereas, rated power is the electrical energy it consumes when the laser operation begins. It is always greater than the optical one as most of it dissipated during the laser gain and amplification. The engraving machine with less rated power and more optical power is an efficient one.
Material Compatibility
Generally, all laser engravers are compatible with most of the materials (wood, leather, fabric, acrylic, cardboard). However, metals are an exception. For metals, fiber engravers are the best. Whereas, for coated metals, you can use CO2 or diode lasers.
Working Area
Do consider the size of the items you plan to work on. Will they be small, intricate pieces like jewelry or decor crafts or larger items like signs?
Make sure that the machine's bed size aligns with the types of projects you intend to undertake. The working area should accommodate your largest planned project to avoid limitations in your work scope.
Engraving Modes
Look for a machine that offers multiple engraving modes. Besides standard flat surface engraving, check if the machine supports rotary engraving (for engraving cylindrical objects) and can handle curved or uneven surfaces.

Laser Engraving FAQs
Is Laser Engraving Hard to Learn?
Laser engraving is relatively easy compared to traditional engraving methods. It is simple enough that beginners can start their engraving projects with just a few tutorials and a user guide.
Is Laser Engraving the same as Laser Cutting?
Laser cutting and engraving are different operations. In cutting, the laser vaporizes the material from the surface to the bottom end, making a clean cut. Whereas, in engraving the material is precisely removed from the surface layers.
Does Laser Engraving Use the Same Machine as Laser Cutting?
Yes, most laser machines are capable of both engraving and cutting. A typical laser cutter can also perform engraving tasks. However, machines designed specifically for low-power engraving may only cut a few millimeters of thick materials.
How to Add Color to Laser Engraving?
In metals like stainless steel, color laser engraving results from a chemical reaction between the laser and the material. An oxidation reaction creates various colors. In other metals, you can replicate the process by applying a colored oxide layer before engraving.
How Deep Does Laser Engraving Go?
Typically, laser engraving is a surface technique, with standard depths around 0.02 mm. However, by adjusting the settings, you can engrave deep to a few millimeters (up to 3mm) inside the material.
How to 3d Laser Engrave?
3D laser engraving involves varying the intensity of the laser beam to remove material at different depths. This creates 3-dimensional patterns on the material. To 3D engrave, you need a laser engraver that is compatible with grayscale images.
What’s the Difference Between Laser Engraving and CNC Engraving?
CNC and laser engraving both use distinct tools. In laser engraving, an intense laser beam vaporizes and removes the surface material. Whereas, in CNC engraving, a rotary router contacts the surface and mechanically removes material by carving or milling the surface.
What are the Differences between Laser Engravers and 3d Printers?
Laser engravers and 3D printers work on two different principles. 3D printing is an additive process. A material (plastic filament) is built up layer by layer to form an object. In contrast, engraving is a subtractive process. It starts with a larger piece of material and uses a laser to cut away layers, forming the final design.
How to Maintain a Laser Engraver?
Inspect and clean the lenses, check the tension in the belts, and lubricate the pulleys. In winter, use the laser engraver in a place where the temperature is close to standard room temperature.
What’s the Difference between Laser Engraving and Laser Marking?
In laser engraving, a high-power laser removes material from the surface to create deep, tangible cuts. The depth can range from 0.001 to 0.125 inches. Whereas, in laser marking, little or no removal material takes place. Instead, a low-powered laser chemically reacts with the surface, leaving a permanent, decolorized mark.
What’s the Difference between Laser Engraving and Laser Etching?
Laser engraving removes material to a significant depth, leading to a 3D appearance and noticeable texture. Laser etching is a subset of engraving, where the material is melted but only at a micro-surface level.
For more questions, please join our community to get inspired!

