
4 Types of Printmaking Techniques
With the invention of printers, you can easily print on multiple materials and replicate designs. But when it comes to making art pieces, and multiple ones, the traditional print-making techniques still stand out. The texture, feel, and look of these prints is more natural and real.
This article explains what printmaking is, the all four traditional printmaking techniques and their rich history and detailed process.
In This Article
- What Is Printmaking?
- Traditional Printmaking Techniques
- Conclusion
What Is Printmaking?
Printmaking simply means transferring images on paper through a secondary surface. Digital printing doesn’t fulfill this definition as design is directly transferred to paper through precise ink injection. Also, printmaking is more about making natural and original prints on paper, rather than photographic copying.
In the traditional printmaking process, a matrix (essentially a piece of wood, metal, or stone), is etched/carved/engraved with a mirror image of design. It’s inked and then pressed onto paper to print the design. This helps in making multiple copies of the same artwork.

The printmaking process itself is quite satisfying for artists and craftsmen. Plus, the quality and originality make each work an art piece.
Traditional Printmaking Techniques
Printmaking has been classified into different types, primarily based on the type of matrix material used for making prints. Some methods use wood, some metal, and some even use a unique material called linoleum.
1. Relief Printing/Block Printing
Relief printing is one of the oldest printmaking techniques that was first used by Egyptians for fabric printing, around 500 BC. Its other historical reference is from East Asia (China), where they used wood-engraved blocks as stamps to sign their artwork.

image credit: moranetzmakes - Youtube
Block Carving Made Easy with Laser
Woodblock printing spread from China to other parts of Asia (Korea and Japan), where it was used not only for texts but also for creating intricate artworks, particularly in Japan with the ukiyo-e style of woodblock prints during the Edo period (1603-1868).
In the West, the relief printing technique took a significant leap forward with the invention of the movable type printing press by Johannes Gutenberg in the mid-15th century. Gutenberg’s press used individual, reusable metal letters and characters for printing.
Process
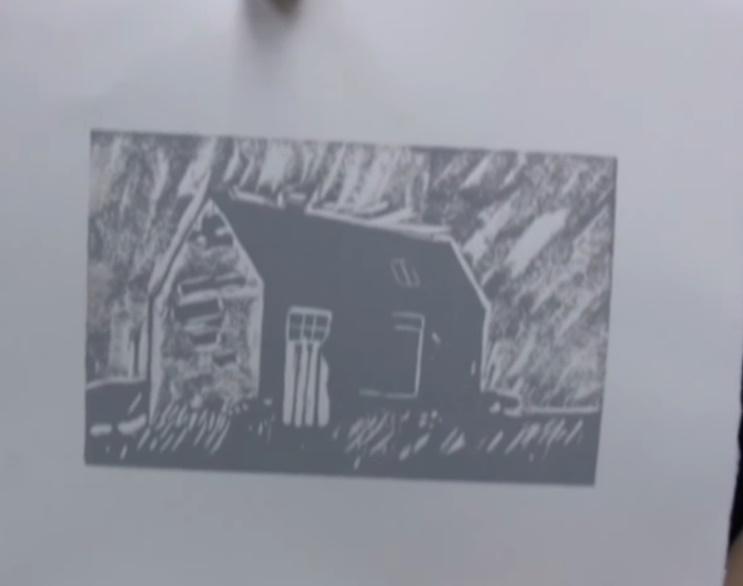
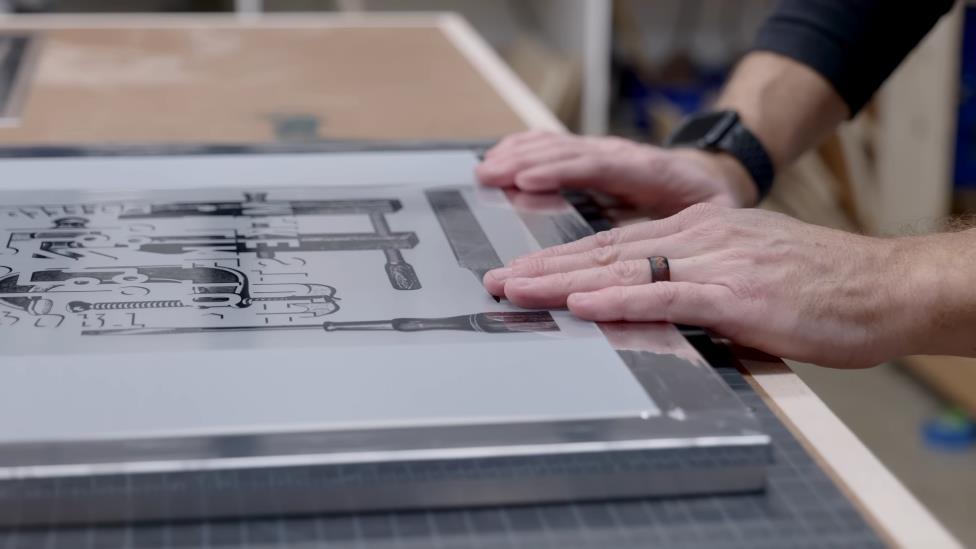
The first step in relief printing is creating a design. This design is then transferred or drawn directly onto the surface of the printing block (wood or linoleum). With carving tools, the skilled artist removes the parts of the block that they do not want to print. The areas left raised will form the image or text.
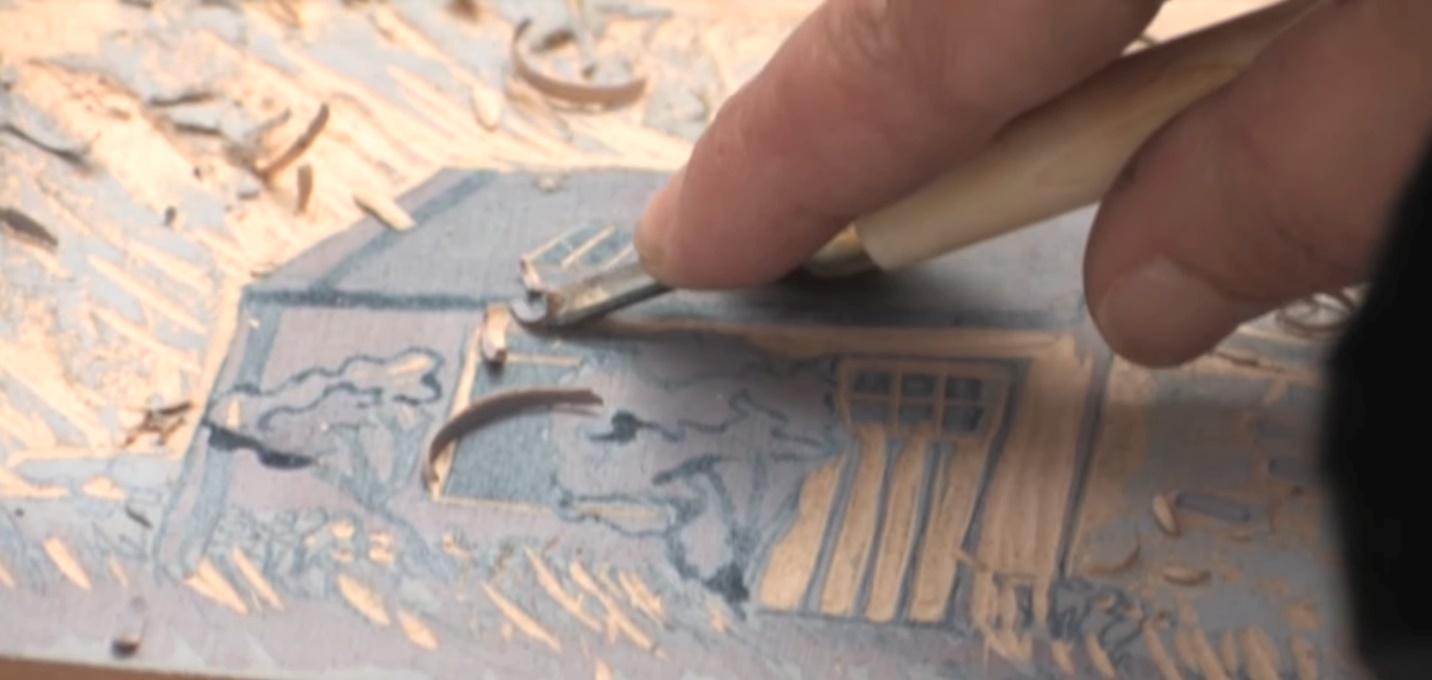
Edinburg Printmaking ©YouTube
Once the block is carved, ink is rolled over the surface using a brayer (roller). The ink adheres only to the raised areas, while the recessed areas remain ink-free.
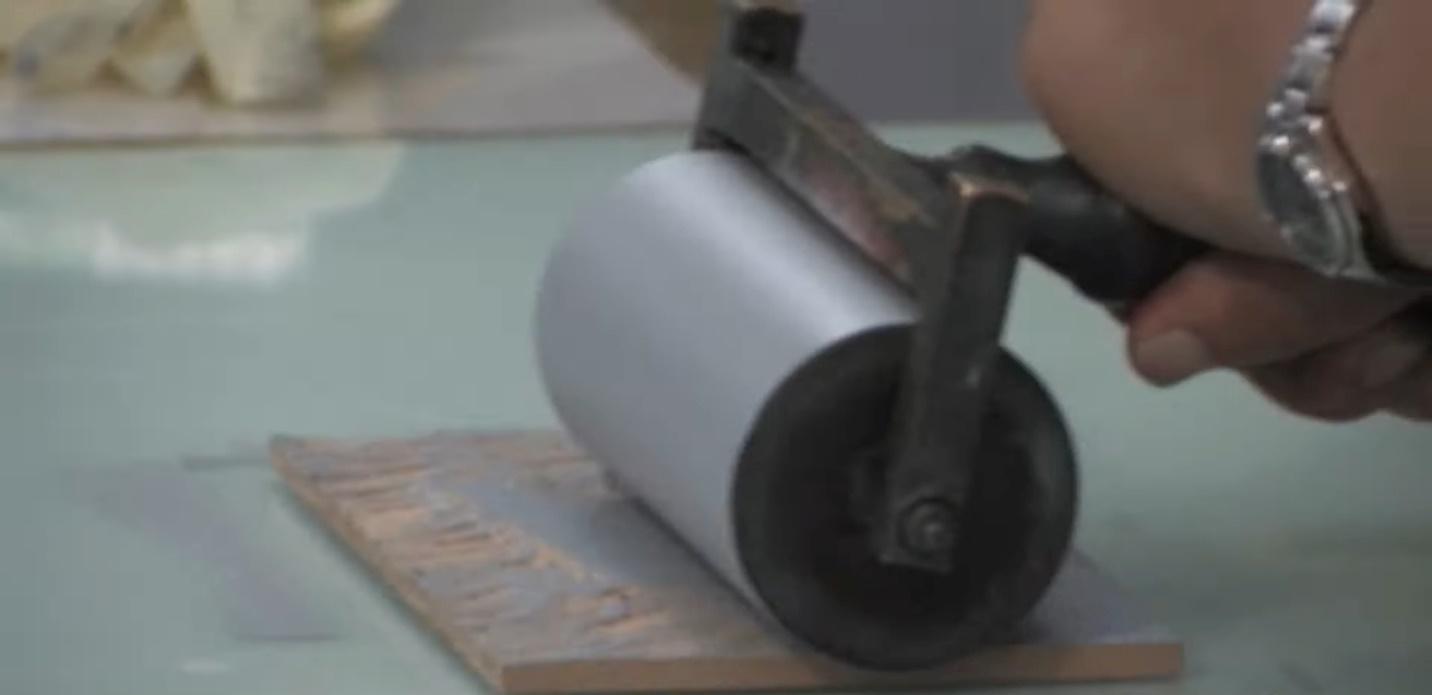
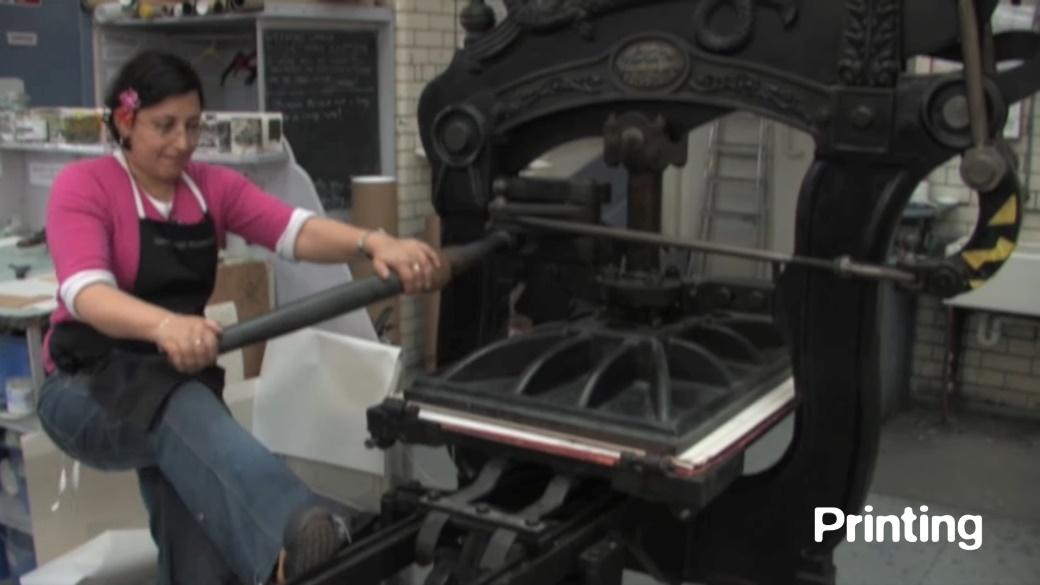
The inked block is then pressed onto the surface to be printed. This can be done by hand, using a baren (a flat, smooth tool) to rub the back of the paper, or with a press, which applies even pressure over the block. The pressure transfers the ink from the raised areas of the block to the printing surface, creating the image.
Types of Relief Printing
Relief printing has multiple subtypes based on the material of the block or the method used for carving. The two very common types are woodcut and linocut.
- Woodcut: Relief printing started with wood, and it’s still one of the popular options. Woodcuts are known for their bold contrasts and the ability to convey a wide range of textures, depending on the wood grain and carving technique.
- Linocuts: This technique was developed as a cheaper alternative to woodblock in the 20th century. The process uses a sheet of linoleum as the printing block. Linoleum lacks the grain of wood, which provides a uniformly smooth surface. It is easy to carve and allows for sharp and clean lines.
Related Reading:
2. Intaglio Printing
Intaglio is another ancient technique with a rich history. The historical evidence suggests it started in the 15th century when German goldsmiths used it to add signatures to their designs. They incised lines on the metallic plate, (particularly copper), with a sharp tool (burin) and then stamped it with ink.
Intaglio is different from relief printing. In this case, the design is a result of incised (sunken) areas. Whereas, in relief printing, raised surfaces create designs.
Process
The term "intaglio" comes from the Italian word "intagliare," meaning "to engrave." In this process, first, the design is carved into the metal plate by either hand tools or chemical etching. If using hand tools, the plate needs to be clamped and polished before engraving.
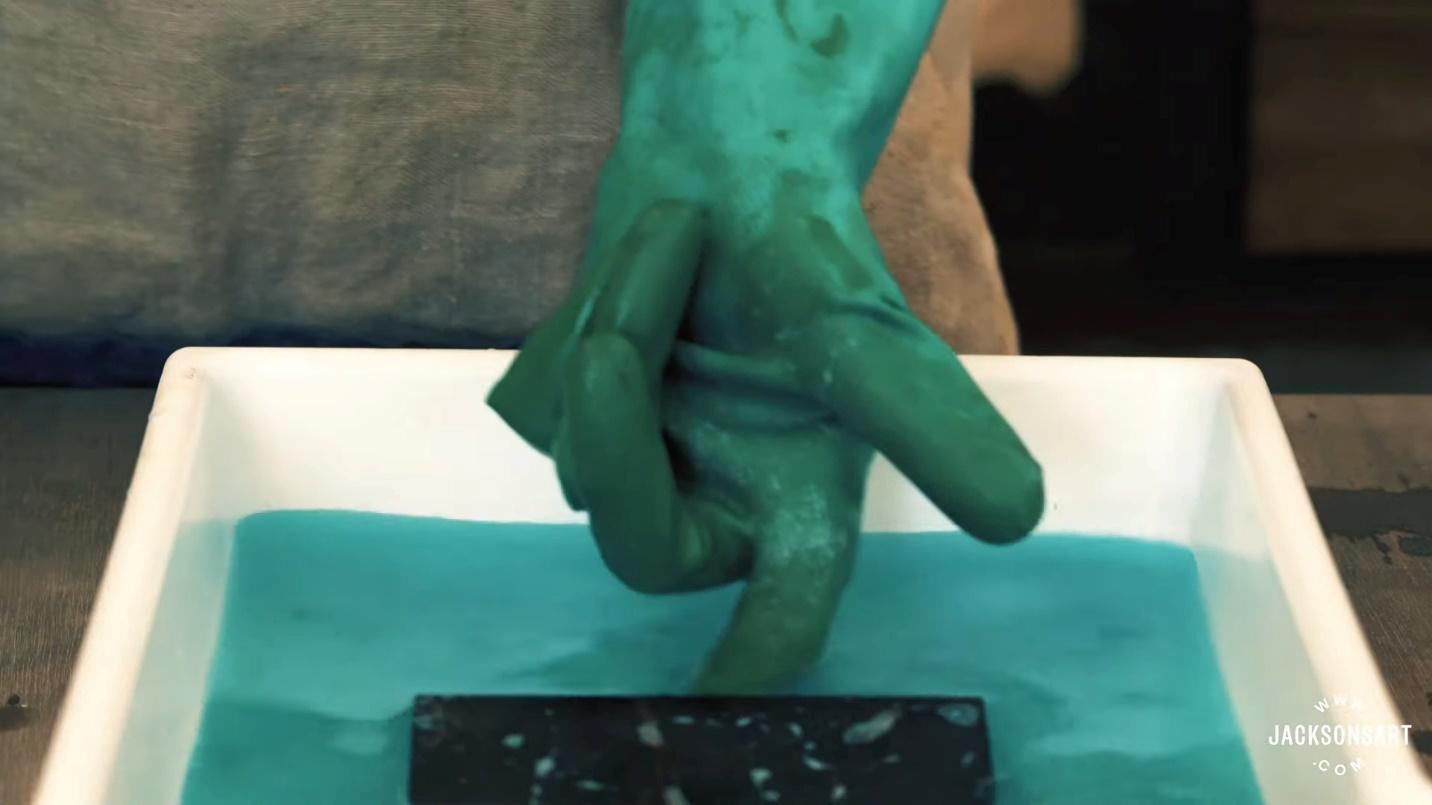
Once the image is created, the metal plate is inked all over, ensuring that the ink goes into the incised lines or areas. The surface is then wiped, which leaves ink only in the incised lines.
The paper used for intaglio printing is typically dampened. This makes it more pliable and better able to receive ink from the incised lines of the plate.
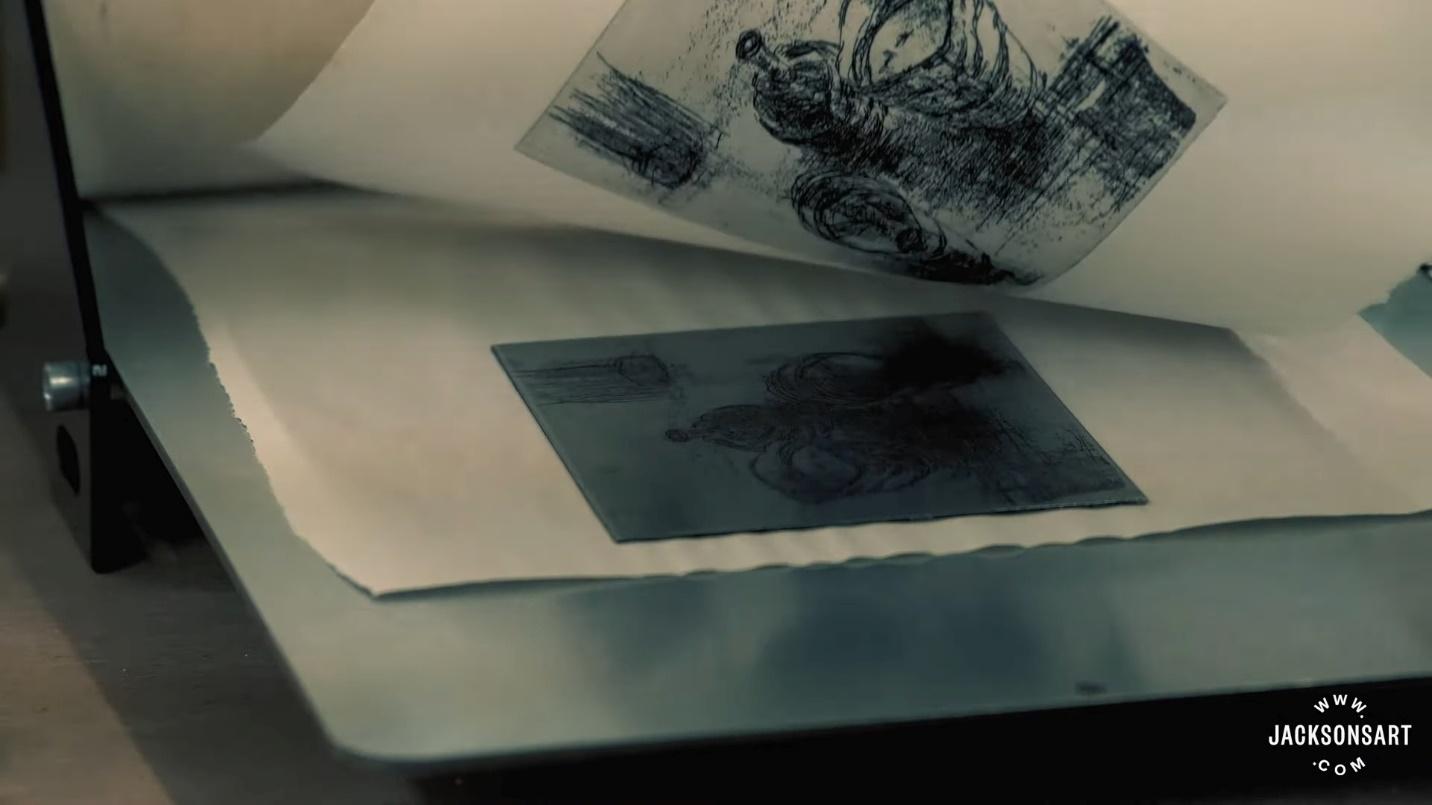
The inked plate and the damp paper are placed on the bed of an intaglio press. A paper is placed on the plate surface, and blankets are laid over the paper to protect it and ensure even pressure.
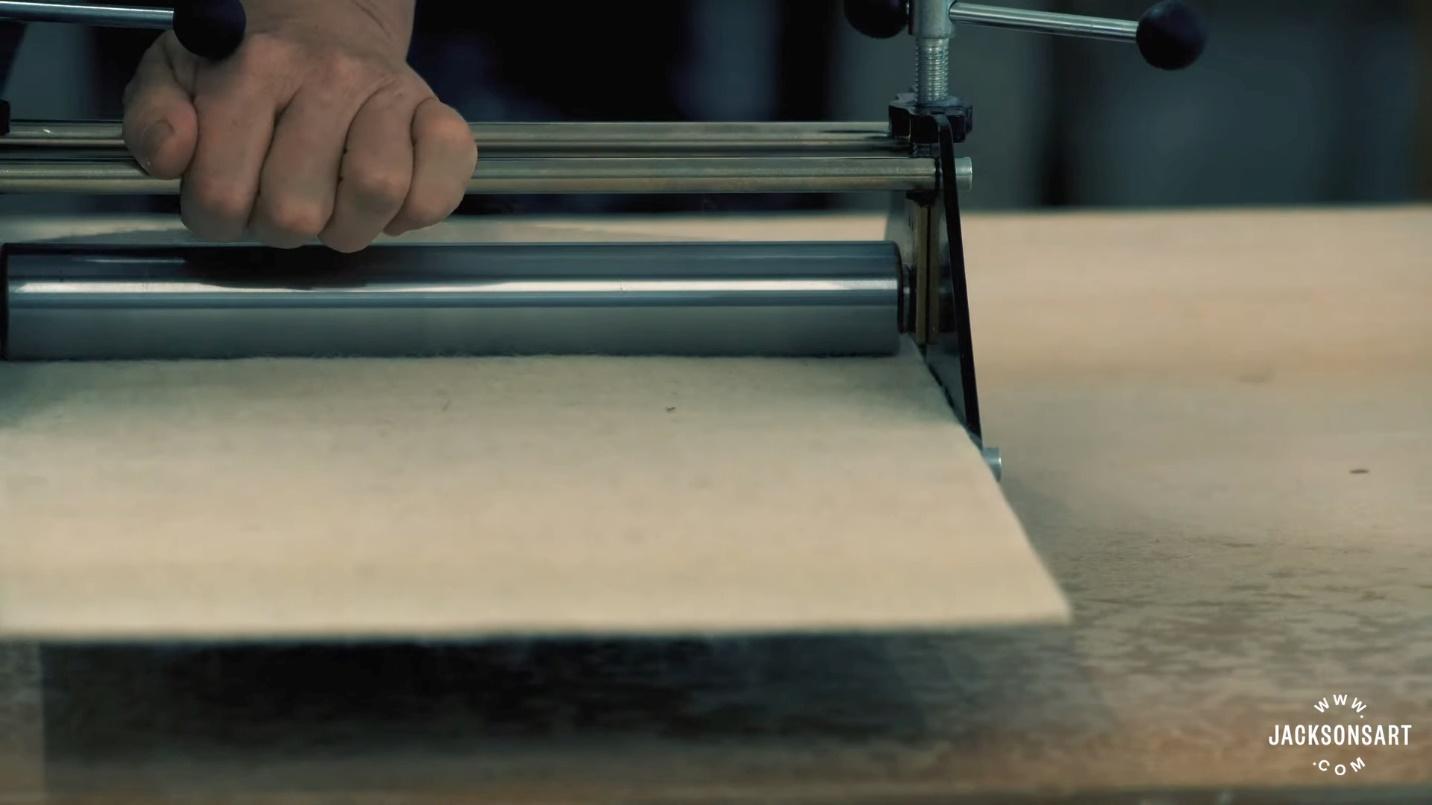
The press applies pressure through rollers and forces the paper into the incised lines, picking up the ink. This step requires significant pressure to ensure the transfer of ink from the plate to the paper.
Types of Intaglio
Intaglio printing is further divided into five sub-types based on how the metal plate is inscribed with design:
- Engraving: It’s the earliest and most significant form of intaglio printing. It’s made by engraving lines on metal plates to create designs. Earlier, the incision was using hand tools like burin, but now power tools may be used.
- Etching: In etching, the artist draws through a protective ground applied to the plate, which is then etched with acid. This method gives greater freedom and fluidity in line drawing compared to engraving.
- Drypoint: Drypoint involves scratching the image directly onto the plate with a sharp needle. Unlike engraving, it leaves a burr along the incised lines, which gives the printed lines a soft, velvety appearance. However, the burr wears down quickly, which means this method is effective only for fewer prints.
- Mezzotint: Mezzotint is known for its ability to produce images with a wide range of tonal values. The entire surface of the plate is roughened with a tool called a "rocker," which creates a texture that would print solid black. The artist then smooths areas to create lighter tones. This gives out prints with a rich, velvety texture.
- Aquatint: Similar to etching, aquatint uses an acid bath to create tonal areas rather than lines. The plate is dusted with a resin that, when heated, adheres to the plate. The acid bites around the particles, creating a textured surface that can hold ink. This technique creates tonal effects similar to watercolor washes.
3. Screen Printing
Screen printing, also known as silkscreen printing, has been used for printing and replicating designs on materials for centuries. Its origins can be traced back to China during the Song Dynasty (960–1279 AD), where it began as a method of applying stencils to fabrics using silk screens.
The use of silk for the screen mesh gave the process its initial name, "silk screening." In the late 19th century, the technique made its way to Western Europe, but it didn't gain widespread popularity until silk mesh became more accessible from the East.
The development of photo-reactive chemicals in the early 20th century allowed screen printing to evolve from a simple stenciling technique to a complex method capable of producing fine art and commercial graphics. Recently, with the introduction of laser engraving machines, the process has become more straightforward and accessible.
Screen Printing Process
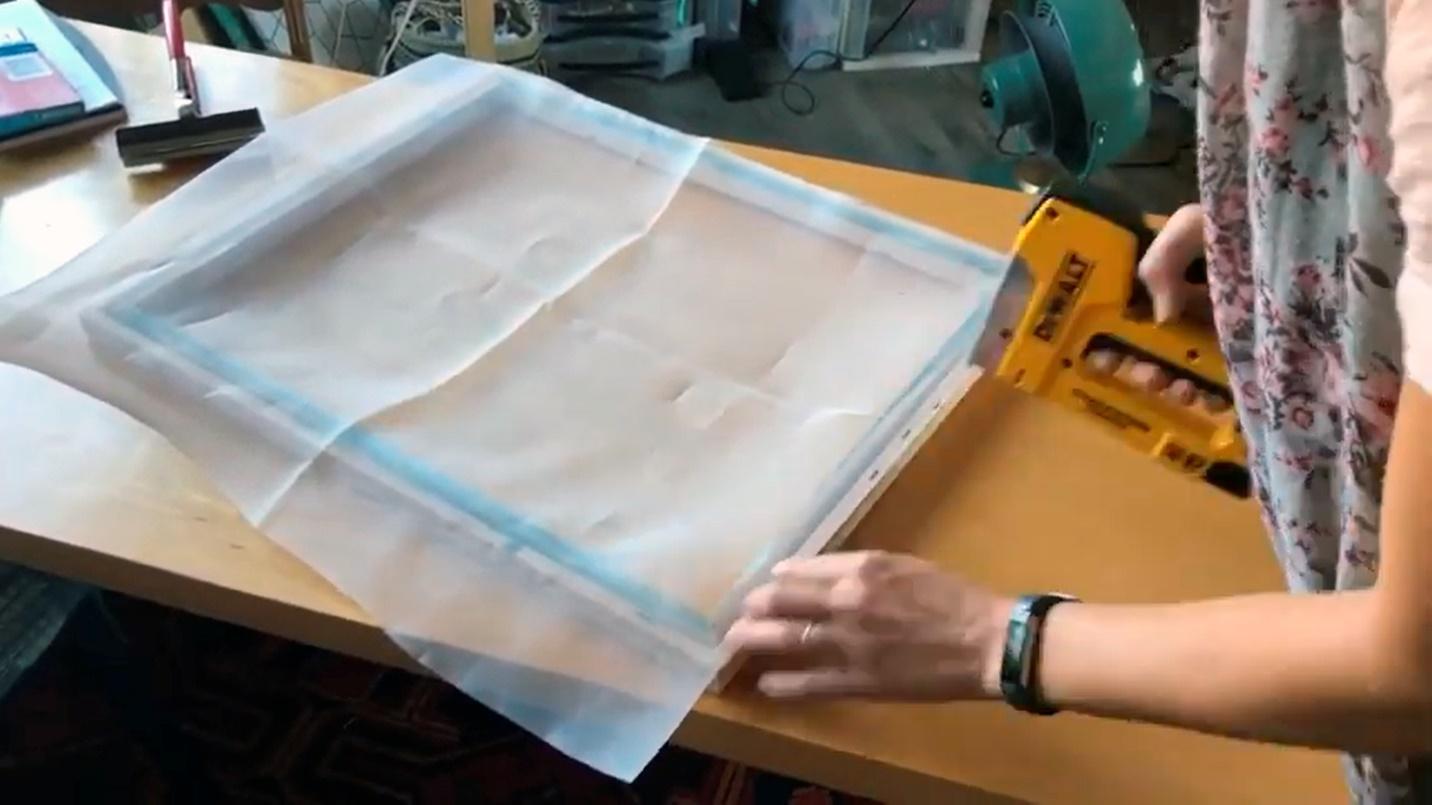
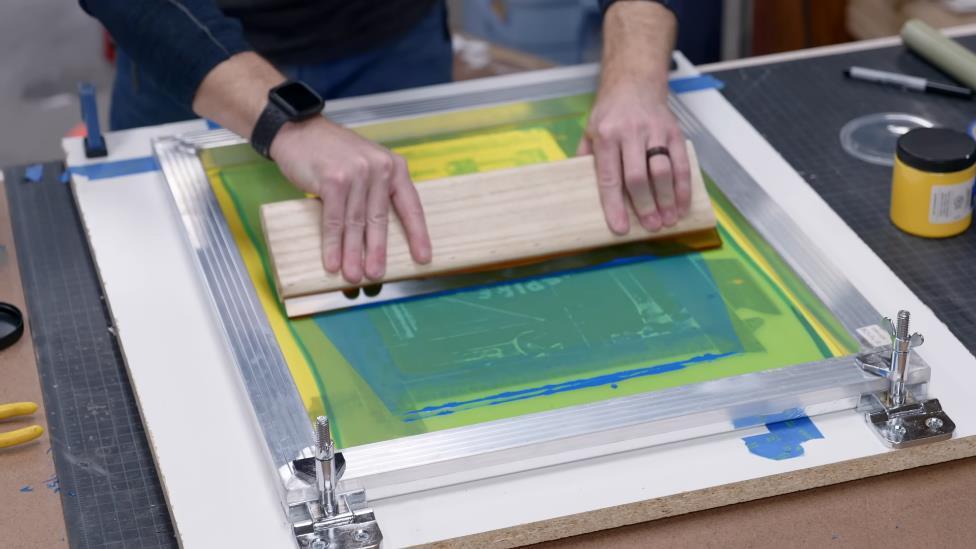
The process starts by stretching a mesh screen over a frame, traditionally made of silk but now more commonly made of polyester. The screen must be taut and secure for accurate printing.
A stencil is created based on the design to be printed. This can be done manually by blocking parts of the screen with plastic film or vinyl.
©ILiketoMakeStuff – YouTube
Alternatively, a photoemulsion technique is used, where a light-sensitive coating is applied to the screen, the design is placed on top, and then it is exposed to light. The exposed areas harden, while the unexposed areas remain soluble and are washed away, creating the stencil.

The screen is positioned over the substrate (paper, fabric, etc.) to be printed on. If multiple colors are to be printed, separate screens must be prepared for each color.
Ink is spread on top of the screen, and a squeegee is used to press the ink through the mesh and onto the substrate below. Only the areas not blocked by the stencil will transfer ink to the material.
Screen Printing Made Easy with Laser Engraving
4. Lithography
Lithograph is derived from two Greek words, “lithos” (means ‘stone’) and “graphein” (means ‘to write’). The method was first introduced in 1796 by a German actor and author Alois Senefelder as a cost-effective method to publish theatrical works.
Senefelder discovered that he could draw on limestone with greasy crayons, apply a mixture of water and acid to etch the non-image areas, and then use the stone to print multiple copies of the image. The process was revolutionary because it allowed for the direct transfer of the artist's drawing to paper without the need for engraving or etching.
The technique quickly spread across Europe and became a popular method for producing posters, maps, books, newspapers, and packaging. In the 19th and 20th centuries, artists began to explore lithography as a medium for artistic expression.
Lithography Process
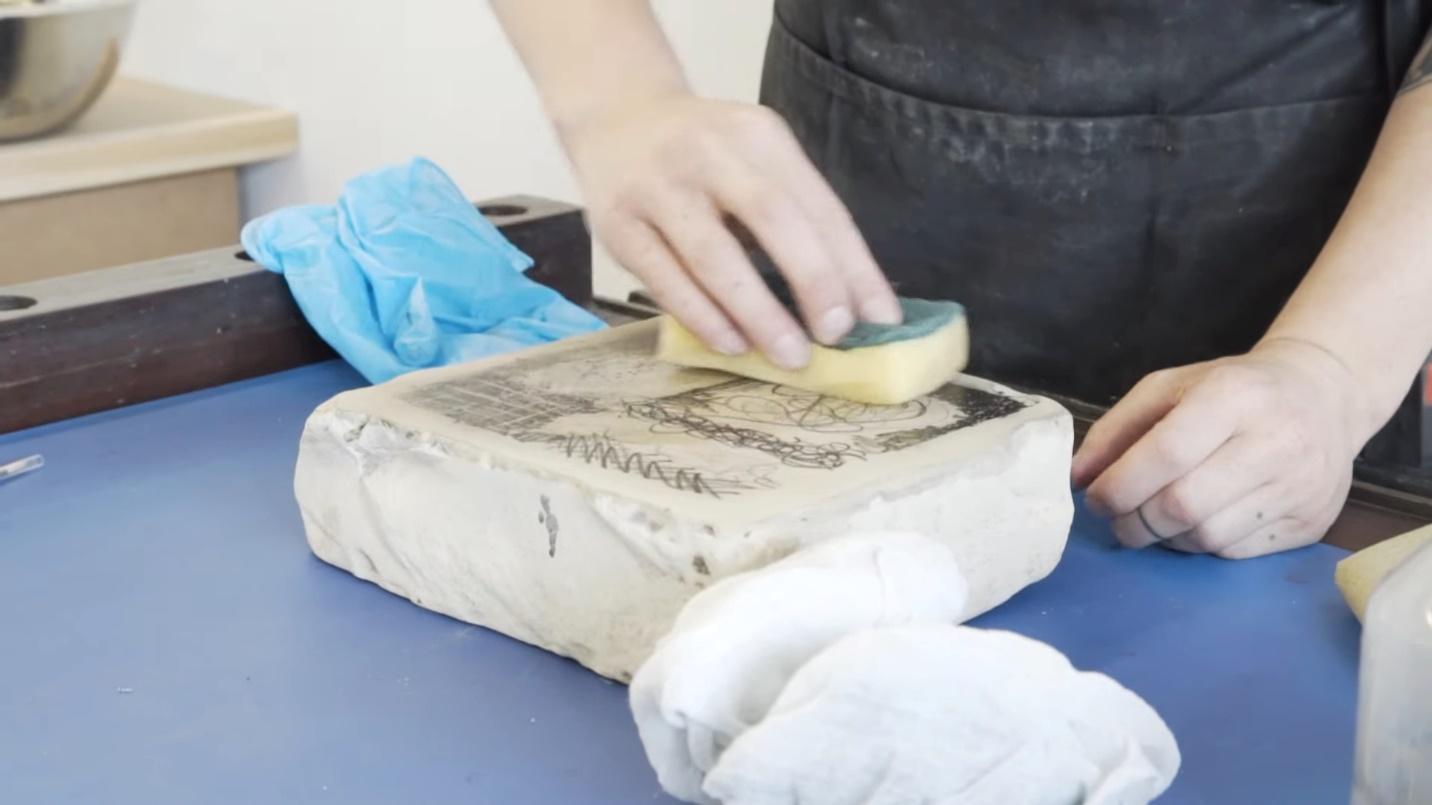
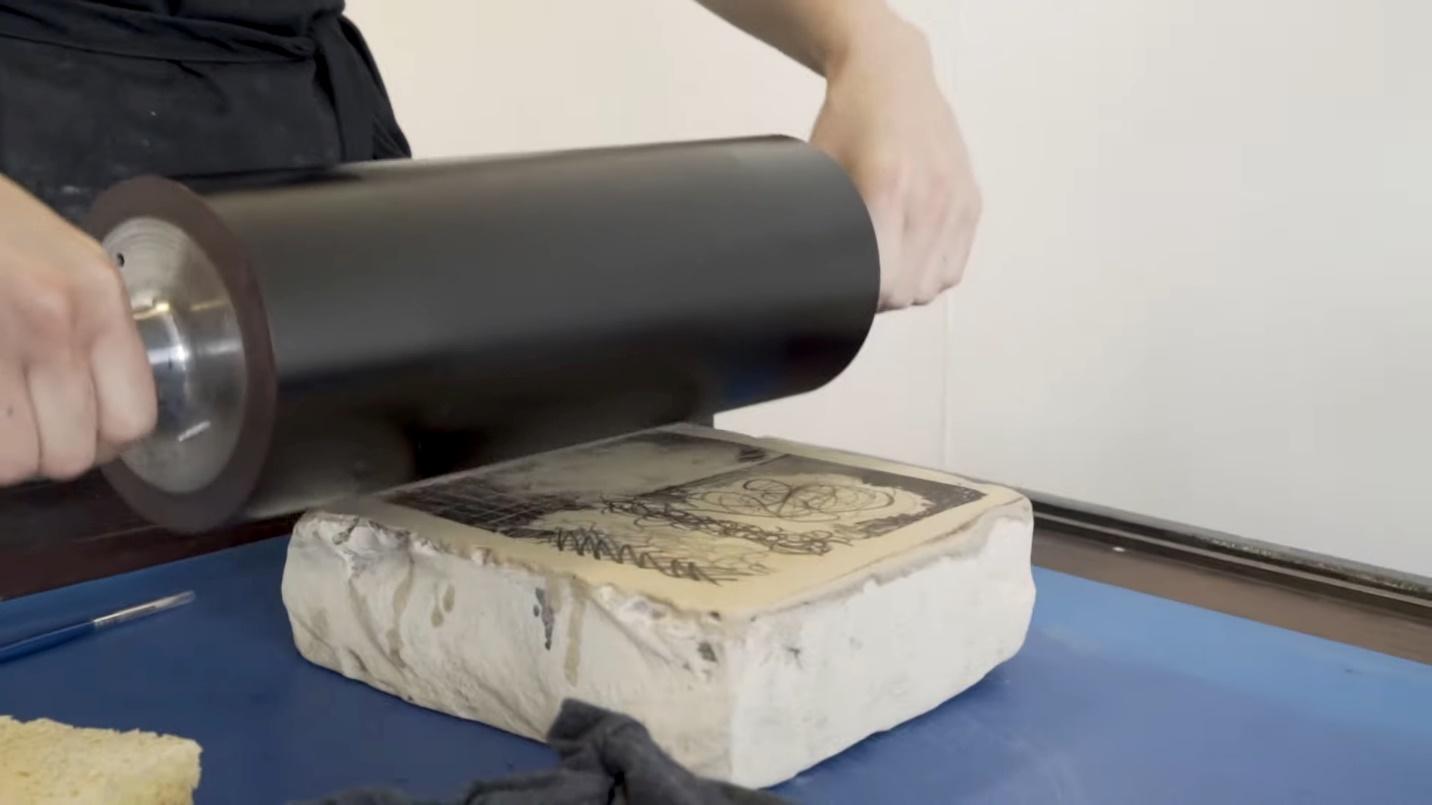
In traditional stone lithography, the artist begins by preparing the limestone surface. This starts with a grinding process to smoothen the surface with abrasives.
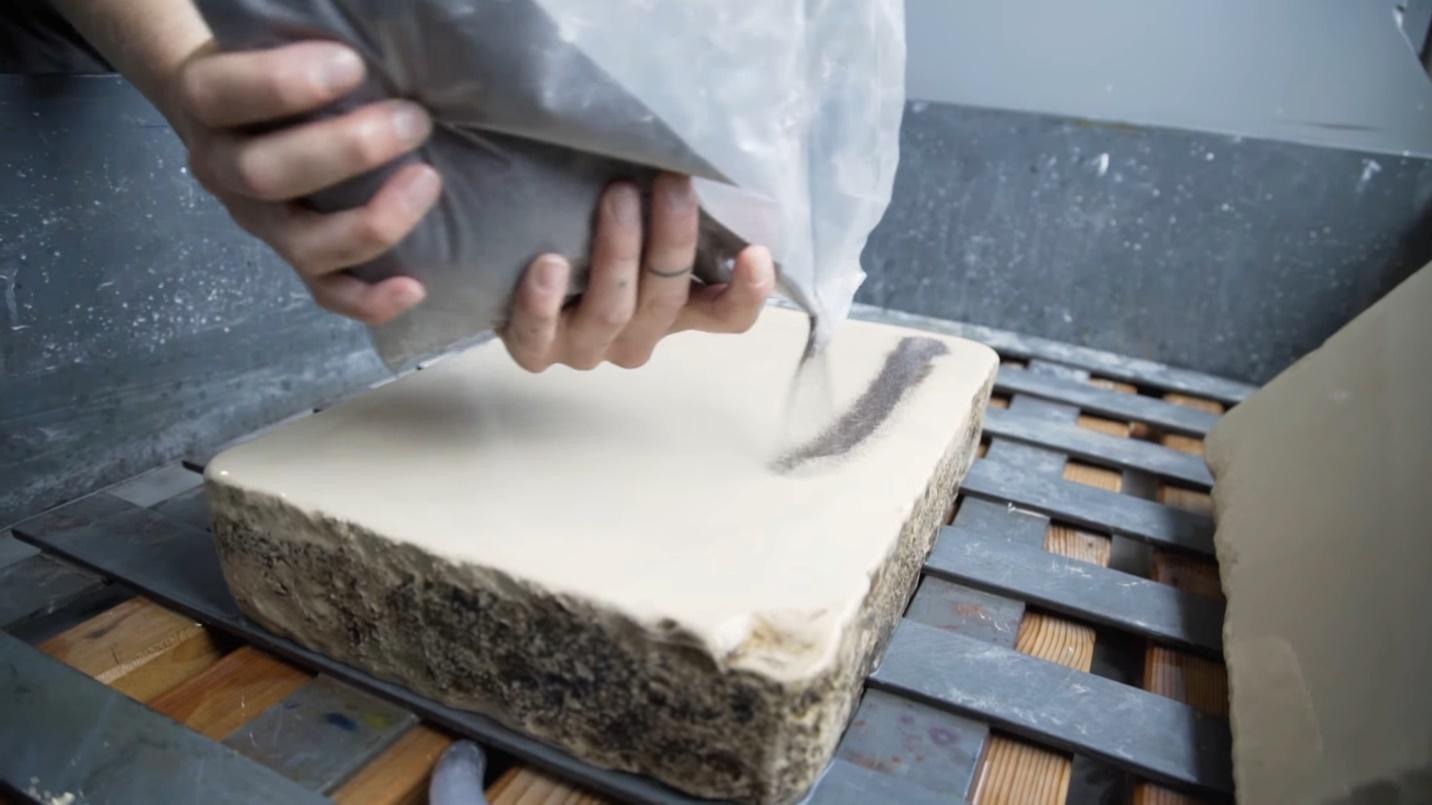
©National Museum Netherlands – YouTube
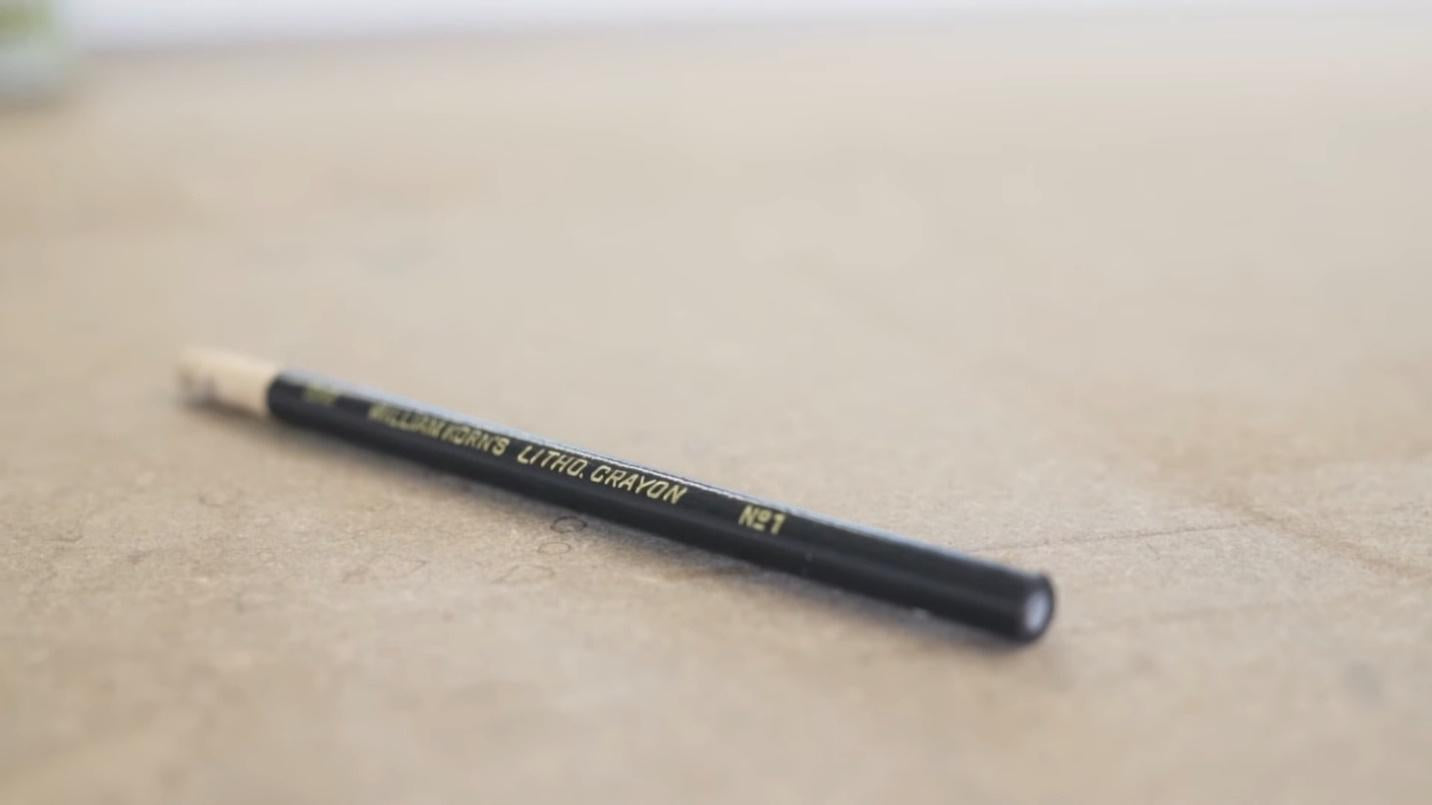
The artist draws on the prepared surface with greasy crayons. The greasy materials used are the key as the lithographic process depends on the repulsion between oil and water (the primary principle behind the process).
Once the drawing is complete, the surface is treated with a chemical solution that etches the non-image areas, ensuring that they will retain water and repel ink. This process stabilizes the image for printing.
The surface is moistened with water, which adheres to the etched areas but is repelled by the greasy drawing. Oil-based ink is then applied, sticking only to the drawn areas.
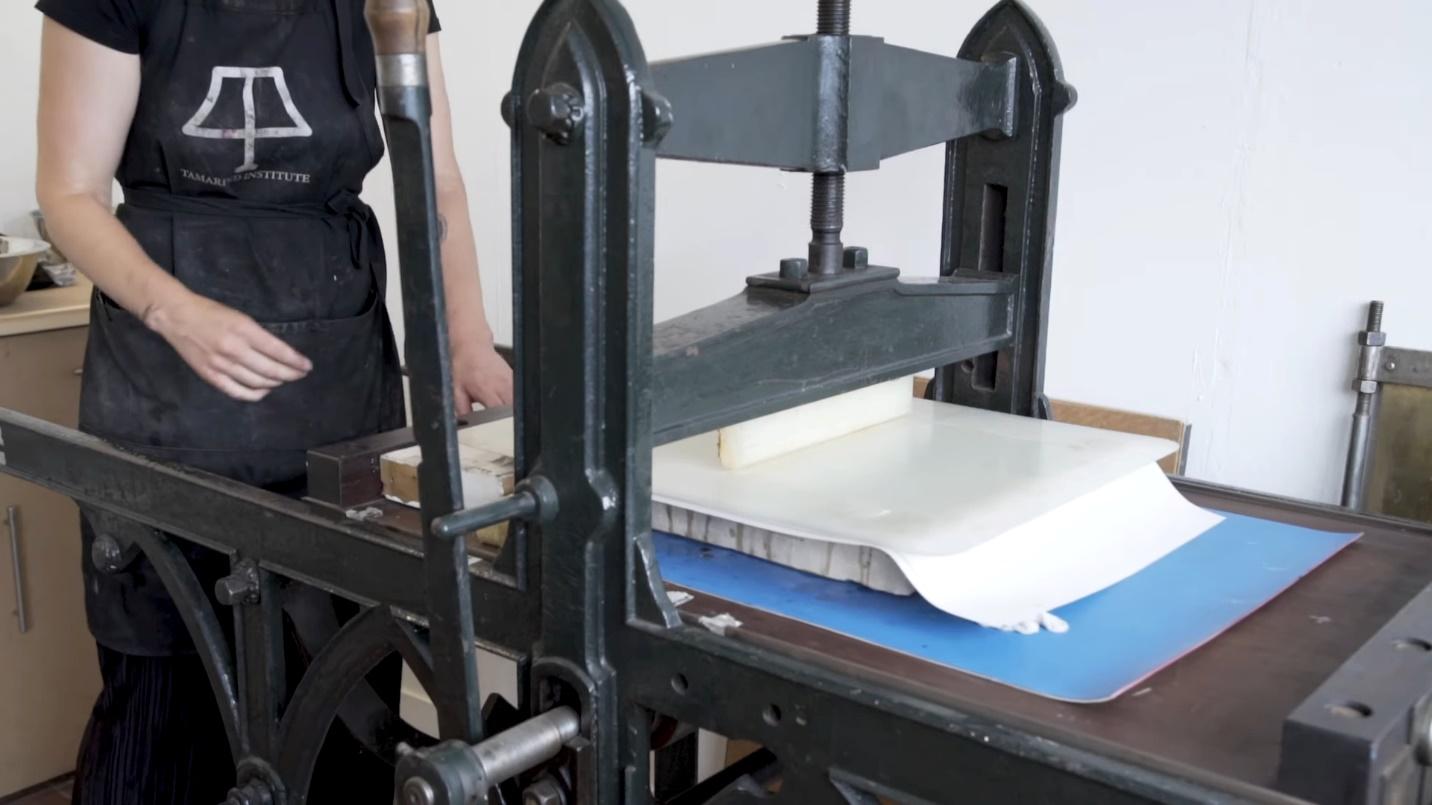
The printing surface (usually paper) is placed on top, and the image is transferred with a press.
Types of Lithography
Like other processes, lithography has other variants as well. The common ones used commercially and for artistic purposes are:
- Stone Lithography: It’s the original form of lithography, which involves drawing directly onto limestone with a greasy medium. After processing, the stone is moistened with water, which is repelled by the greasy areas and absorbed by the untreated stone. Oil-based ink is then applied, and used for printing.
- Plate Lithography: Similar to stone lithography, but uses flexible aluminum, zinc, or polyester plates instead of limestone. This method is more accessible and less cumbersome, which makes it popular for smaller studios and educational settings.
- Offset Lithography: The most common form used today, especially in commercial printing. The image is transferred from a plate to a rubber blanket and then to the printing surface. This method allows for high-quality, consistent prints and is used for a wide range of products, from books to packaging.
- Photolithography: A process used primarily in the manufacturing of microelectronics, where patterns are transferred onto a substrate using a light-sensitive chemical process. It is used for the production of circuit boards and semiconductor devices.
Conclusion
Before the widespread use of modern printers and press machines, traditional printmaking techniques such as relief printing, intaglio, lithography, and screen printing were the primary methods for creating printed works. These processes remain highly valued for their unique qualities and artistic potential.
For more questions, please join our community to get inspired!

