How to Screen Print with Vinyl Stencils?

Screen printing is known for printing vibrant designs. But it’s true – the traditional screen printing process can be a bit of a drag. One needs to spend hours in emulsion and waiting for stencils to dry. That’s the thing of the past now. Vinyl stencils change the game, making the process much quicker and more efficient.
In this article, we will guide you through the quick and easy steps of screen printing using vinyl. From choosing the right type of vinyl to gathering all the necessary accessories, we have got you covered.
In This Article
- What is Vinyl Screen Printing?
- Materials and Equipment Needed for Vinyl Screen Printing
- Screen Printing Process with Vinyl Stencils: 10 Quick Steps
- FAQs on Vinyl Screen Printing
- Conclusion
What is Vinyl Screen Printing?
Vinyl screen printing is a quick type of screen printing. A vinyl sheet is cut according to the required design and then attached to a silkscreen, acting as a design stencil. Ink is pushed through the silkscreen and the design gets printed on the material.

The whole process is similar to the traditional process, except here the stencil is prepared through vinyl, which is the main reason this process is quicker.
Materials and Equipment Needed for Vinyl Screen Printing
In order to vinyl screen printing a design, make sure you have the following materials and equipment:
1. Vinyl Sheet: It is the primary material you need. You can either use self-adhesive vinyl or iron-on vinyl for this purpose. Use self-adhesive vinyl if you need to print a singular design and want the silkscreen to be reused. However, if you want to create a permanent stencil for making multiple similar designs, use the Heat Transfer vinyl (HTV).
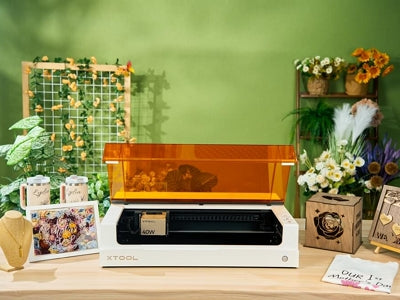
2. Vinyl Cutter: Vinyl needs a specialized cutter. For intricate and detailed designs, you can use xTool M1. It’s the world’s first hybrid laser and vinyl cutter. Its specialized blade is capable of cutting around 1.5mm thick vinyl in a single pass. The machine is fully automated with a high accuracy.

xTool M1 Smart Laser Engraver and Vinyl Cutter
3. Screen for Printing: You need a silkscreen for printing. It is usually stretched over the frame. It holds the vinyl stencil and is used to transfer the ink onto the fabric. The mesh allows ink to pass through the open areas of the stencil.
4. Transfer Tape: Used for transferring the cut vinyl design onto the screen. It helps to lift the vinyl stencil and place it accurately on the screen without distortion.
5. Screen Printing Ink: This is a special ink used in screen printing. It can be water-based or plastisol based on your requirements.
6. Squeegee: A tool with a rubber blade to evenly spread the screen printing paint across the screen. It ensures that the ink is pushed through the mesh and the stencil onto the t-shirt.
7. Cardboard or Parchment Paper: You can either use cardboard or parchment paper. Place it underneath the shirt to prevent bleeding through the other side of the shirt. Parchment paper is often preferred due to its rich absorbing capabilities.
8. Spatula: Used for scooping and transferring excess screen printing paint back into its container.
9. Painter's Tape: This tape is used to cover and protect areas of the screen that are not part of the design. It prevents ink from passing through these areas during the screen printing process.
Screen Printing Process with Vinyl Stencils: 10 Quick Steps
Vinyl screen printing is relatively quicker than traditional screen printing. To streamline and get it done rightly, here are a few steps that will guide you:
Step 1: Prepare Your Vinyl Design
First, you need to create a design to imprint on your t-shirt. You may do that in any graphic design software.
In most cases, you end up placing the design at the corner of the vinyl to save the sheet. But in this case, center the design on the vinyl sheet to leave room on the edges.

©Sugar Bee Crafts – YouTube
Also, since the vinyl will be attached to the bottom of the screen, remember to mirror the image. In your cutting software, select the design, then choose ‘object mirror’ and ‘flip horizontally’.
Step 2: Cut and Weed the Vinyl
Cutting vinyl is a difficult job that cannot be done with ordinary blades or scissors. You need a specialized

After cutting, weed out the parts of the vinyl where you want the paint to appear on the shirt. For instance, if printing text, remove the letters.
Step 3: Add Transfer Tape to Vinyl
Cut a piece of transfer tape to the size of your vinyl design. Apply the transfer tape over the vinyl design. Use a scraper to firmly adhere the transfer tape to the vinyl.

Next, flip over and remove the paper backing from the vinyl, exposing the sticky side.
Step 4: Attach Vinyl to the Screen
You need to attach the vinyl (sticky side down) to the backside of the screen. It will keep the front surface free since you’ve to apply ink through this side. Position the vinyl centrally on the screen for easier alignment on the shirt.

Scrape the vinyl onto the screen to ensure it is fully adhered to it. Then, carefully remove the transfer tape; peel to the side rather than straight up.

Step 5: Preparing the Stencil for Printing
The silkscreen is often larger than the stencil. So, its boundary will be uncovered. Use painter's tape to cover any exposed areas of the screen that are not part of the design. This step prevents ink from passing through these areas during printing.

Step 6: Set Up the T-Shirt
Place a piece of cardboard or parchment paper inside the t-shirt to prevent paint from bleeding through. Next, position the screen on the t-shirt where you want the design to be printed.
Step 7: Apply the Ink
Apply a generous amount of screen printing paint at the top of the design on the screen. Make sure the paint covers the entire width of the design.

Step 8: The Screen Printing Process
Hold the squeegee at an angle. Drag the squeegee across the screen, evenly spreading the paint over the design. If the design is large, ask someone to help hold the screen in place.

Step 9: Remove the Stencil
After one smooth pull with the squeegee, carefully lift the screen off the shirt. If there is excess paint on the squeegee, scrape it back into the container for reuse.

Step 10: Drying and Setting the Print
Allow the printed design on the t-shirt to dry completely. Once it’s dry, place a scrap cloth or pressing cloth over the design. Iron over the cloth to heat set the ink into the fabric.

FAQs on Vinyl Screen Printing
What is the Best Vinyl for Screen Printing?
The best vinyl for screen printing depends on the project’s requirements. For one-time use, adhesive vinyl is ideal due to its ease of use and quality. For designs that need to be reused multiple times, HTV (Heat Transfer Vinyl) is recommended for its durability and ability to create permanent stencils.
How to Cut Vinyl for Screen Printing?
You can cut vinyl with a specialized vinyl cutter. One great tool is xTool M1, a hybrid laser and vinyl cutter, which is capable of cutting 1.5mm thick vinyl in a single pass.
Is it Cheaper to Screen Print with Vinyl?
Screen printing with vinyl can be more cost-effective, especially for small batches or custom designs. It eliminates the need for expensive screen-making processes and materials.
Conclusion
Screen printing with vinyl is a quick and fun way to stylize your clothing. The stencil creation process is simplified with the use of vinyl, especially when you have efficient cutting tools like M1. By following the 10 steps outlined in this guide, you will get the best screen prints with ease and precision.
Related Articles

How to Make Prints of Your Art?

10 Unique Mother’s Day Gift Ideas


