How to Make Wood Earrings with A Laser Cutter?
Love wearing earrings for different occasions? Sometimes, it’s hard to find the perfect jewelry, especially when you don't have time to shop. Why not make your own? With a laser cutter, creating wood earrings is easy. It’s a one-time investment that lets you craft multiple small items, not just earrings.
In this article, we will show you how to make wooden earrings with a laser cutter. We'll cover every necessary aspect and share some design ideas to get you started.
In This Article
- Materials and Tools Needed to Make Wood Earrings
- Step-By-Step Guide on Making Wooden Laser Cut Earrings
- Laser Cut Wood Earrings Design Inspiration (With Free Design Files)
- Conclusion
Materials and Tools Needed to Make Wood Earrings
Making wood earrings doesn’t require a long list of materials or tools. You can start with these few things:
Laser Cutter
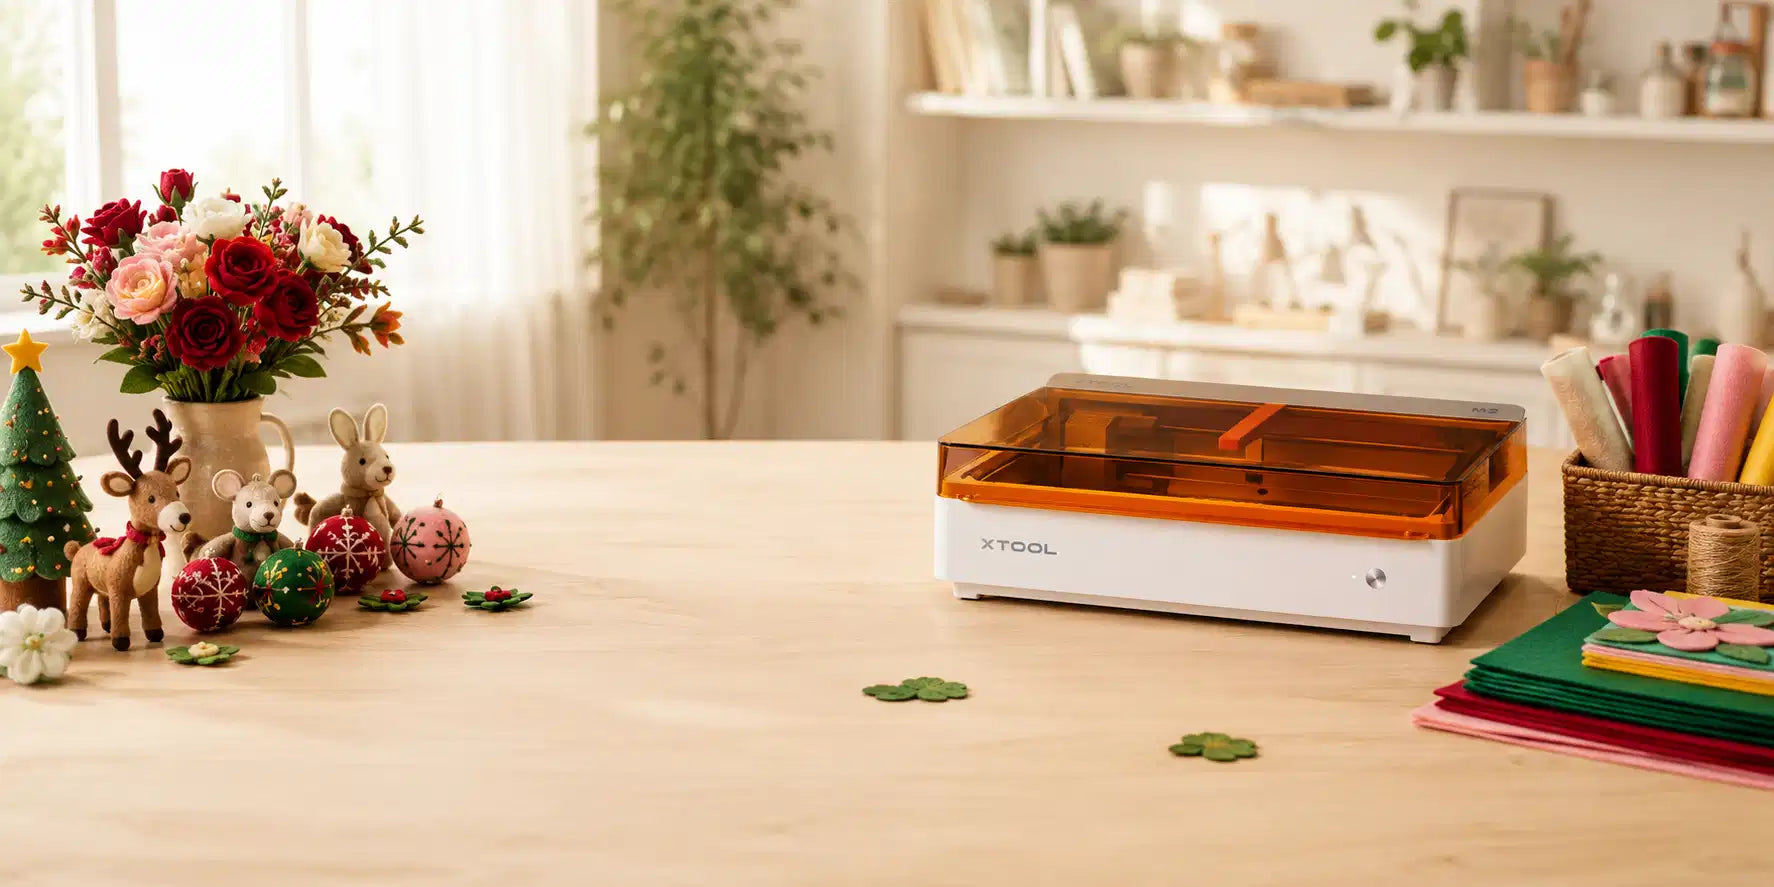
The laser cutter is the primary tool needed for making DIY earrings. For working with wood, a CO2 laser is typically recommended. However, for crafting small items like earrings, a heavy-duty CO2 laser isn't necessary. A desktop laser cutter like xTool M2 is sufficient and more affordable for this job.
xTool M2 is a 20W diode laser cutter and engraver, which is perfectly sized for making DIY wooden crafts like earrings. With its ACS and dual cameras, you just place the plywood sheet, drag the design, and the laser does the rest.
Design Software
Since you're creating custom earrings, you will need a design file to feed into the laser cutter. You can design this in any graphic design software, such as Adobe Illustrator, or use laser control software like XCS.
Types of Wood Suitable for Laser Cutting
Most wood types are suitable for laser engraving, but light-hued softwoods like alder, basswood, and poplar are especially ideal for laser. When engraved, they develop a slightly dark texture that looks striking against a light background. For those who prefer darker shades, walnut, cherrywood, or ebony are excellent choices.
You don’t have to use a solid wood sheet, instead opt for laser-compatible plywood sheets from the xTool store, which are thin and sized appropriately for laser crafting.
Sandpaper
You need sandpaper to smooth the wooden sheet's surface before cutting or engraving a design onto it. A paper with grits between 100 to 220 will be fine for the job.
Earring Hooks/Studs
Earring hooks are essential components for finishing your earrings. They allow you to attach your newly crafted pieces to earring backs, making them ready to wear.
Optional:
Masking tape: To prevent burn marks during the laser cutting process, you can apply laser masking tape to the wood. It protects the surface and maintains the quality of your design.
Paint/stain: You might want to add color to your earring designs. Choose a paint that suits your design needs. Similarly, you can stain the wood before engraving to enhance its appearance.
Sealer: To ensure that your engravings last longer and resist erosion, apply a sealant or resin. A clear sealant is recommended to preserve the wood’s natural grain and texture.
Step-By-Step Guide on Making Wooden Laser Cut Earrings
Now that you have the necessary tools, here's a detailed, step-wise procedure for making wooden laser cut earrings:
Step 1: Get a Design File
Create a design to cut or engrave the earring. Any graphic design software could be used. Another option is to download a free laser cut file and modify it using XCS according to your needs.
Step 2: Prepare Wood for Laser Cutting
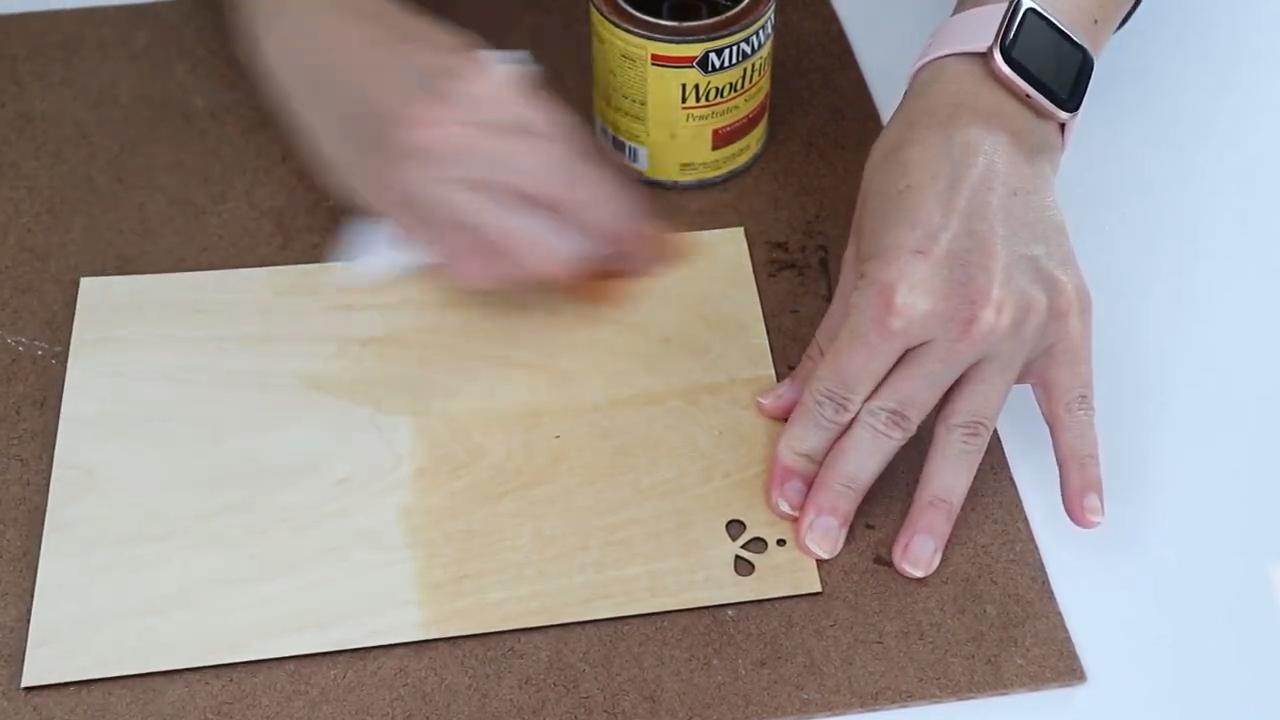
If the wood surface isn’t smooth, sand it to make it smooth. You may also choose to stain the wood before cutting. To prevent burn marks, experts recommend slightly dampening the wood or applying masking tape.
Step 3: Import the Design File in Laser Control Software
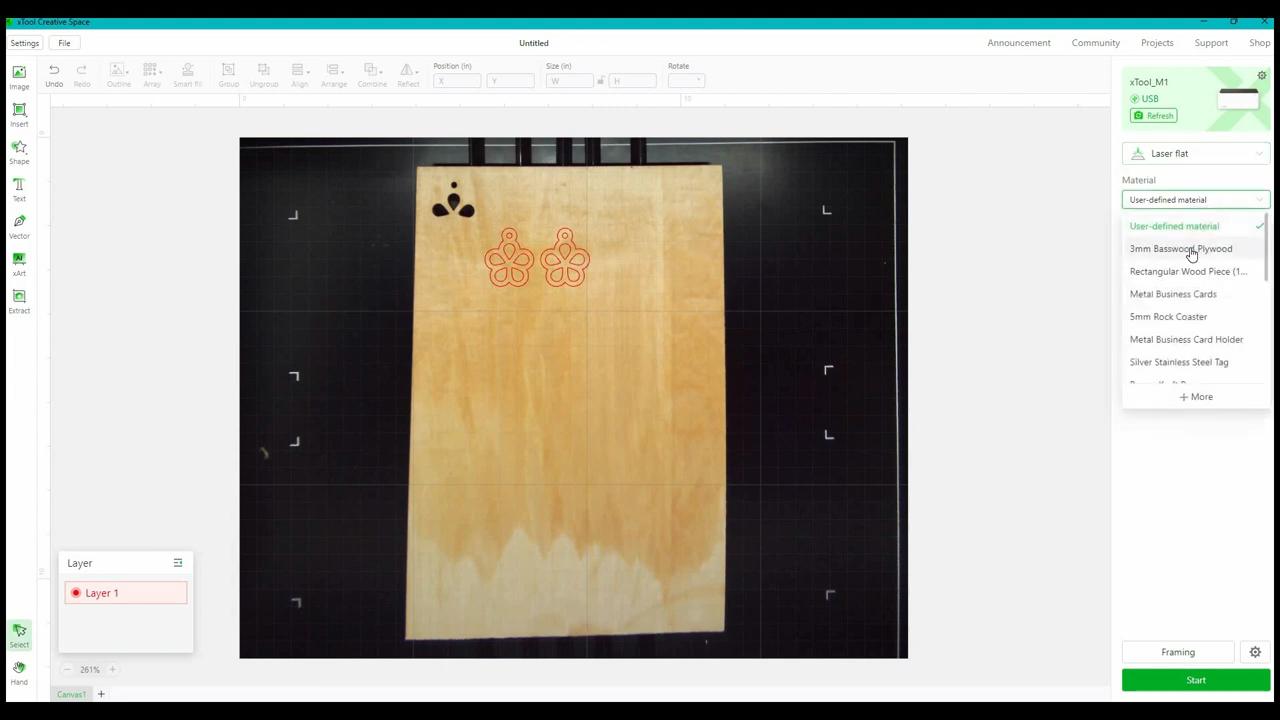
Connect your laser cutter (in this case, the M2) to your PC. Open the XCS software, import the design file, and position it over the wooden sheet. Make any necessary design adjustments.
Step 4: Laser Cut the Wood

The XCS software includes pre-set speed and power settings for various materials. Select the material and its thickness, and the software will automatically adjust the parameters. You may also alter these settings manually (if needed). Once everything is set, begin the cutting process.
Step 5: Decorate the Earrings
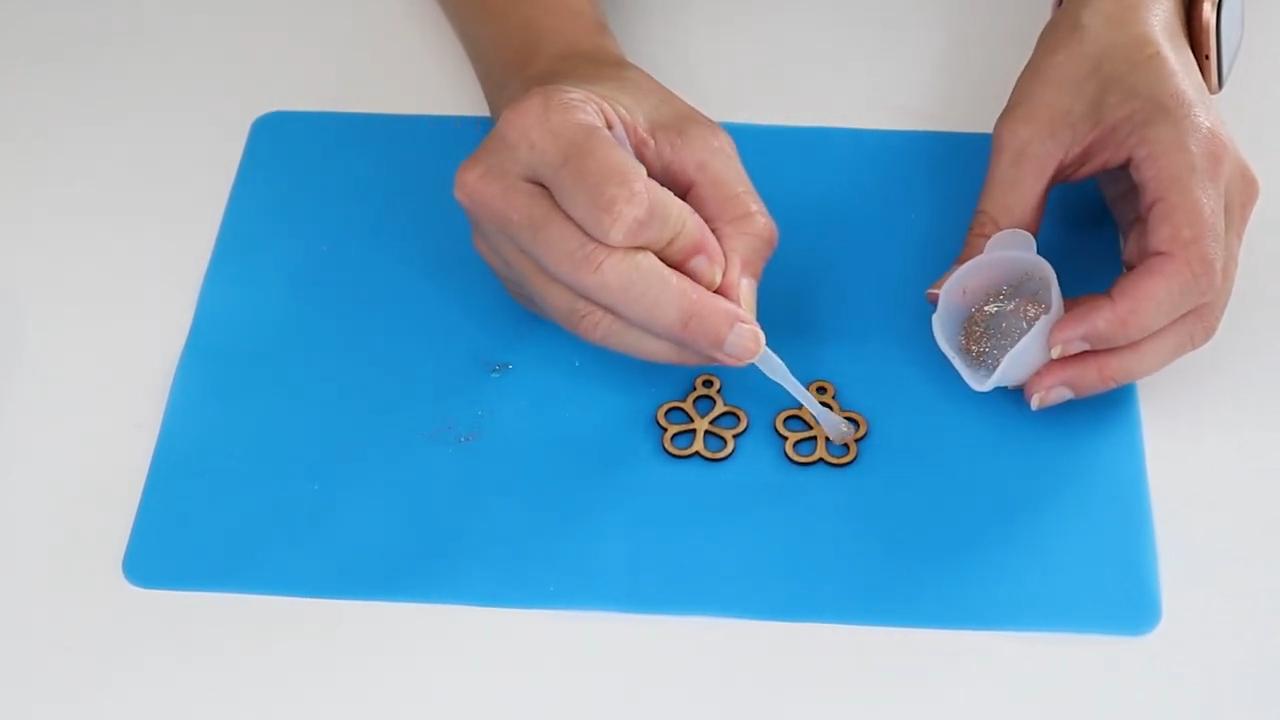
After cutting, you can decorate the earrings according to your design. Options include adding colors, applying resin, or finishing with a coat of lacquer.
Step 6: Add Earring Hooks
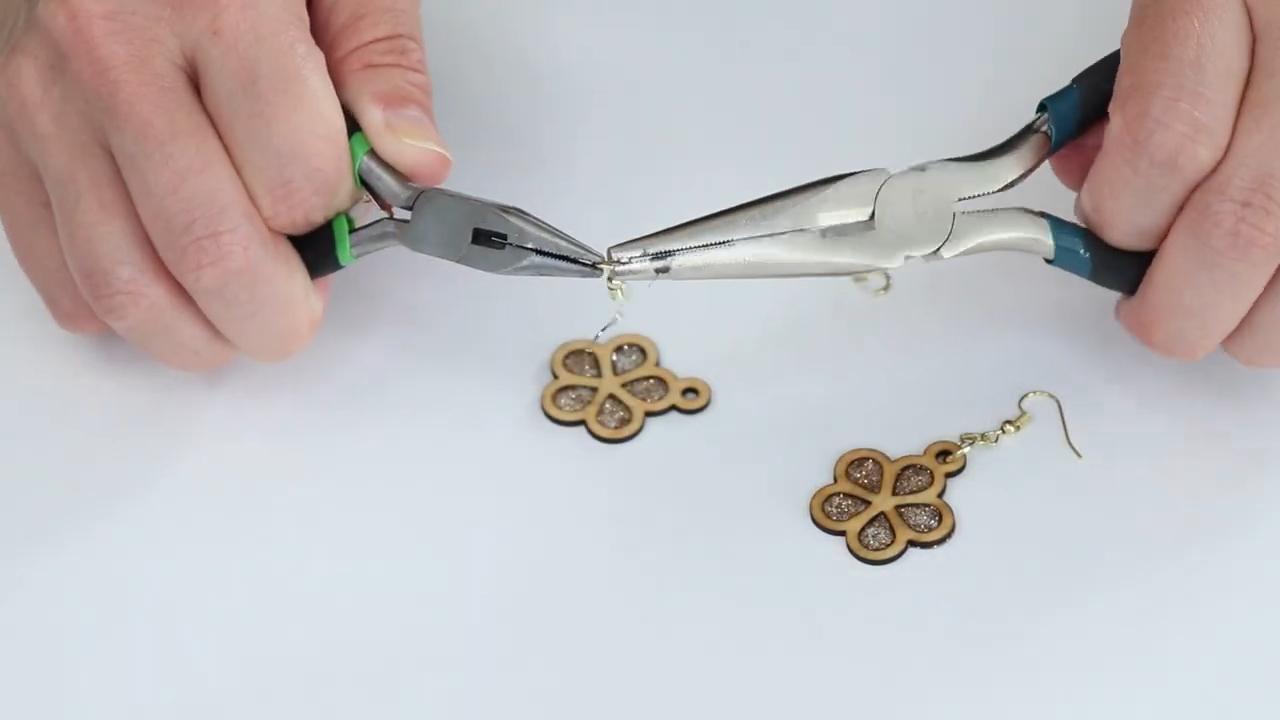
Attach earring hooks or studs to complete the earrings and prepare them for wear.
Related Reading:
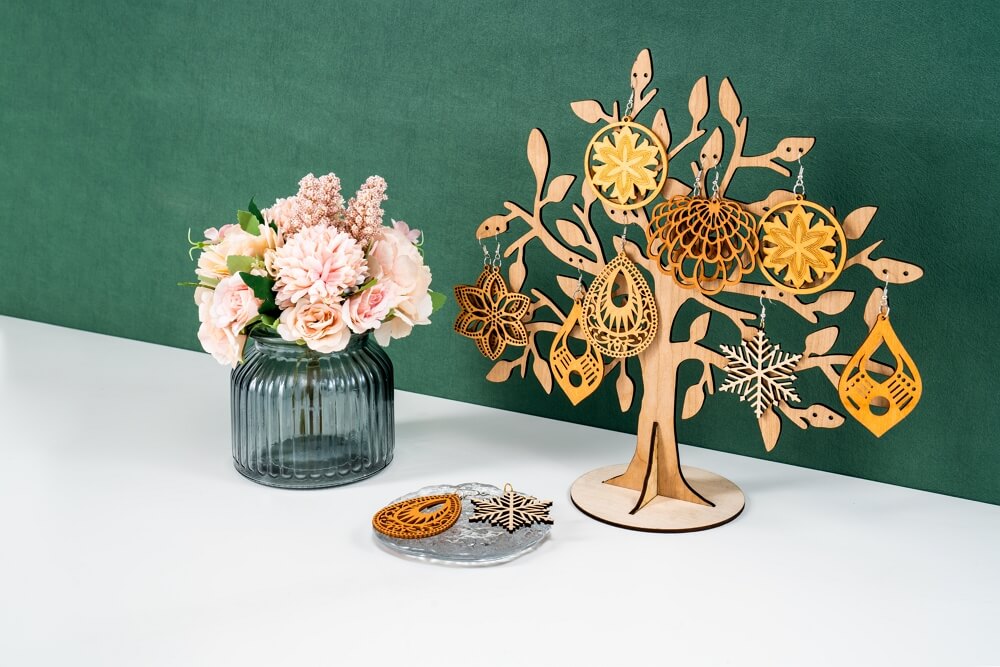
Laser Cut Wood Earrings Design Inspiration (With Free Design Files)
Want to create your custom earrings but lack ideas? Here’s a perspective to design to make.
Design themes
Nature
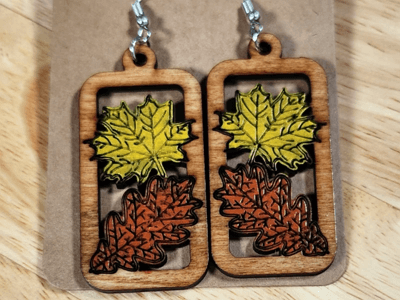
Earrings can either celebrate the natural look of wood with visible grains and textures, or they can depict natural elements like trees, leaves, or flowers. Such earrings are perfect for casual outings where you want to sport a natural, earthy vibe.
Geometric
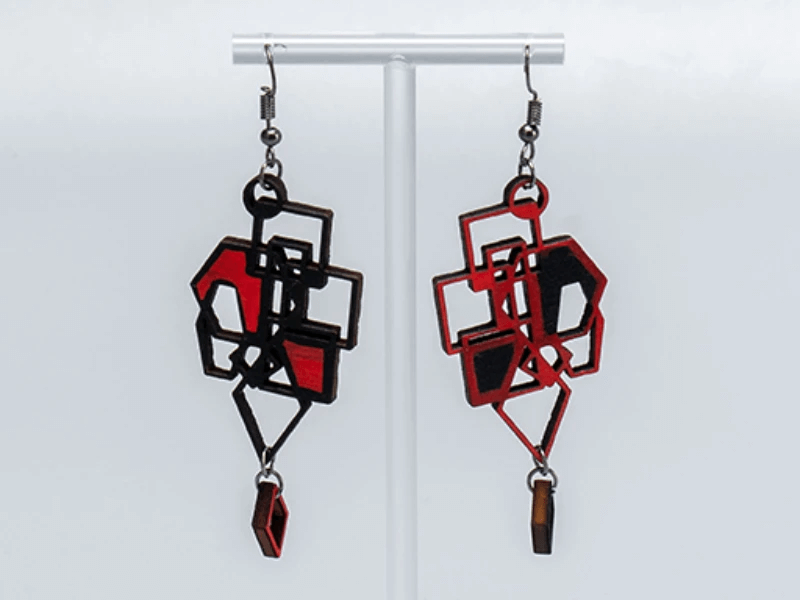
Earrings with geometric patterns can be sharply cut with a laser. These designs remove any fussiness and are best for those who love a sleek, modern look. They’re especially fitting for office wear or minimalistic styles at social events.
Seasonal
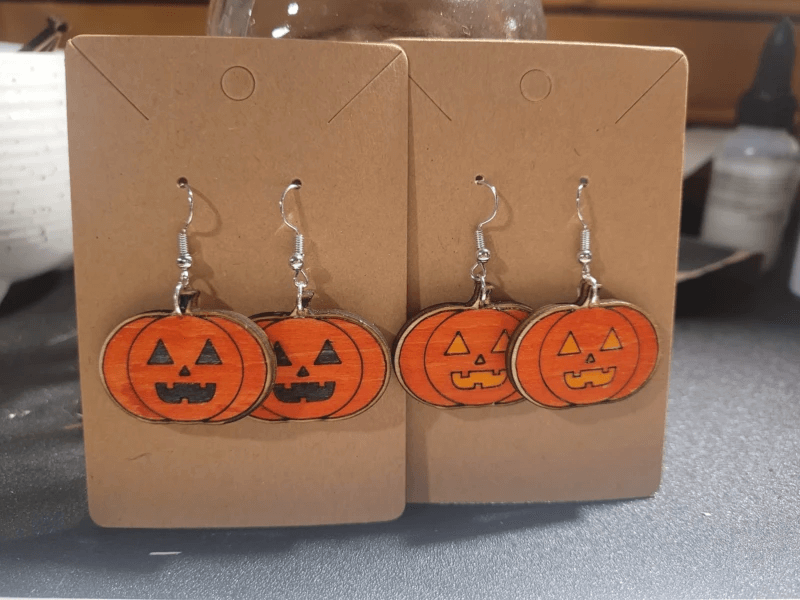
Create earrings for specific seasons or events. For example, you might make earrings shaped like pumpkins for Halloween or design them to match the theme of a holiday party.
Design Techniques
When creating your earrings, you can use these techniques to enhance the design:
Layering
Create earrings in layers to achieve a three-dimensional effect. This technique adds an interesting visual depth that catches the eye.
Mixed media
Consider using a combination of two different materials. For instance, you can incorporate wood veneer to add textural contrast and visual interest.
Engraving
Engraving designs into the wood adds a personal touch to earrings, making them special. You can engrave your name initials, small graphics, or intricate patterns to make the piece unique.
Paint and stain
Sometimes, adding color can transform a simple laser-cut earring. Applying paint or stain can enhance the visual appeal of your earrings, making them vibrant and eye-catching. This could also help you match them with various fashion styles.
Conclusion
Desktop laser cutters have simplified the creation of custom DIY crafts. With just one machine, you can experiment with various designs and produce numerous personalized jewelry pieces.
Why wait to show off your creativity and style? Grab a laser cutter today, start crafting your own unique wooden earrings, and showcase your personalized flair!
For more questions. Please join our Facebook group to get inspired!