
How to Print on Fabric at Home: Top Ways Explained
There is a creative genius in everyone — and one way of finding your creative expressions is by printing your fabric at home.
Home fabric printing is becoming increasingly popular by the day. One contributing factor to this popularity is the affordability of modern printing technology. Aside from that, it's a sure way of imprinting your unique style and personality on your things.
Home fabric printing could also be a means to earn some cash. Yes, fabric printing could be that side hustle or business you've been looking for. In this guide, you will discover the different methods of fabric printing.

In This Article
- Screen Printing on Fabric
- Heat Transfer Printing on Fabric
- Block Printing on Fabric
- FAQs of Printing Fabric at Home
Screen Printing on Fabric
If you're like most people, the traditional screen printing process is what comes to mind. The traditional screen printing process takes time. It's quite lengthy — and it takes a couple of days to print your own fabric at home.
Materials and Tools Needed for Screen Printing on Fabric
Traditional screen printing requires a wide range of tools like:
- A printer
- A frame and screen
- A squeegee
- An emulsion
- A scoop coater
- An exposure unit
- Inks
You will also need a controlled space for washing and drying. It's quite cumbersome, and not the best fit for DIYers who may be working with limited space and tools.
How to Print on Fabric with a Screen Printer?
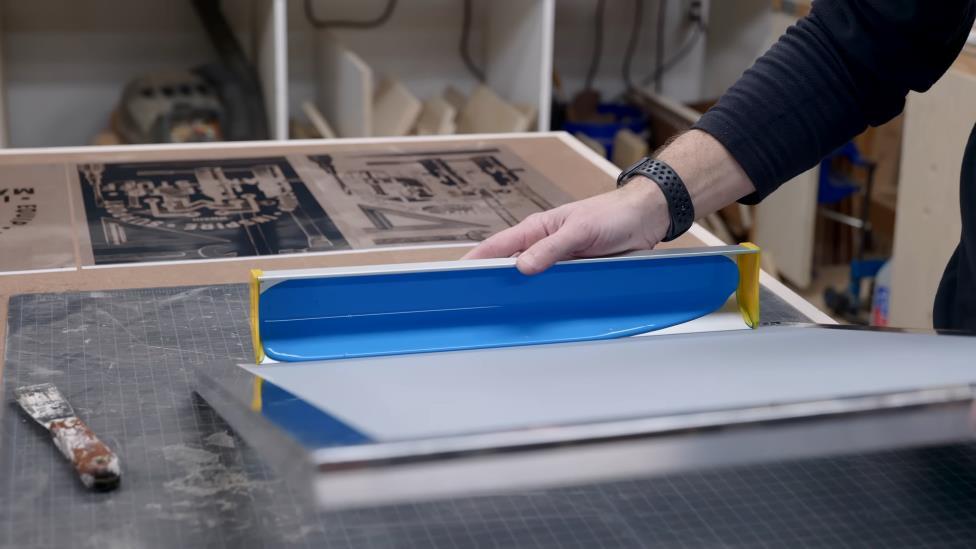
Step 1: Screen Stretching
It involves stretching a mesh screen in a frame. It is typically made of polyester or silk.
Step 2: Emulsion Coating
Using an emulsion scoop coater, the screen is coated with a photosensitive emulsion. The design stencil is created from the emulsion. If done properly, you will have an even layer of photosensitive emulsion spread across the mesh.
©ILiketoMakeStuff – YouTube
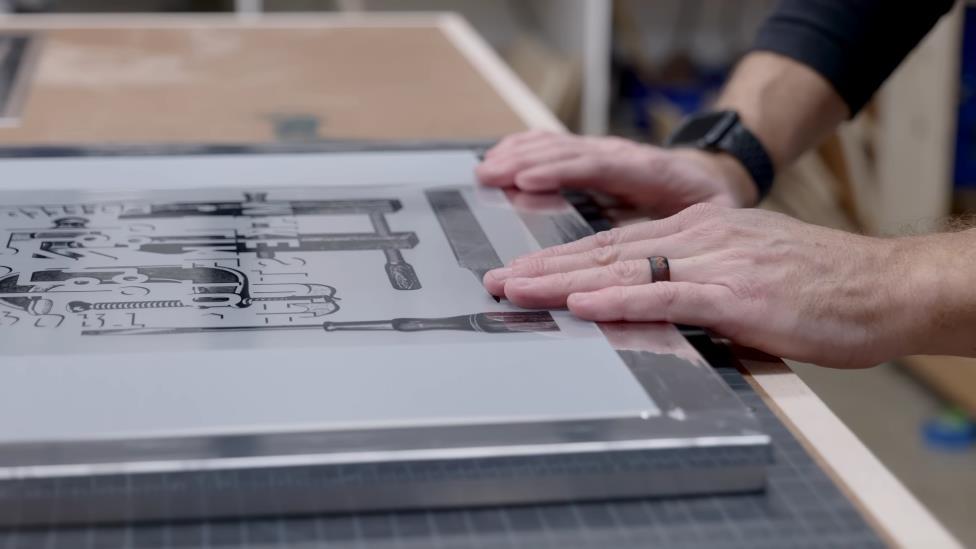
Step 3: Film Printing
Your preferred design should be printed onto a transparent film. Using a transparent tape, attach the transparent film to your emulsion-coated screen.
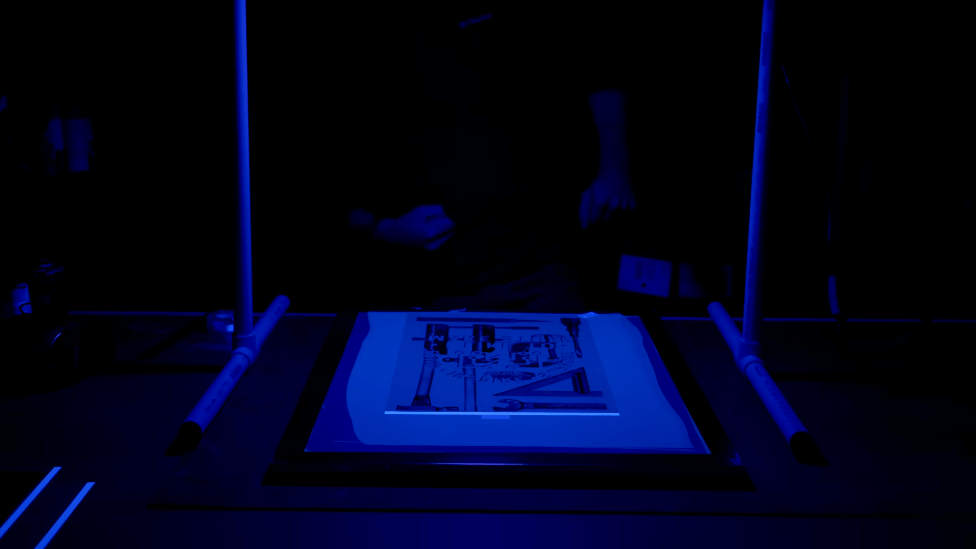
Step 4: Screen Exposure
The emulsion-coated screen is exposed to an ultraviolet light source. Emulsion not covered by the design is hardened by the light. Screen exposure is the magic ingredient that helps in developing the stencil.
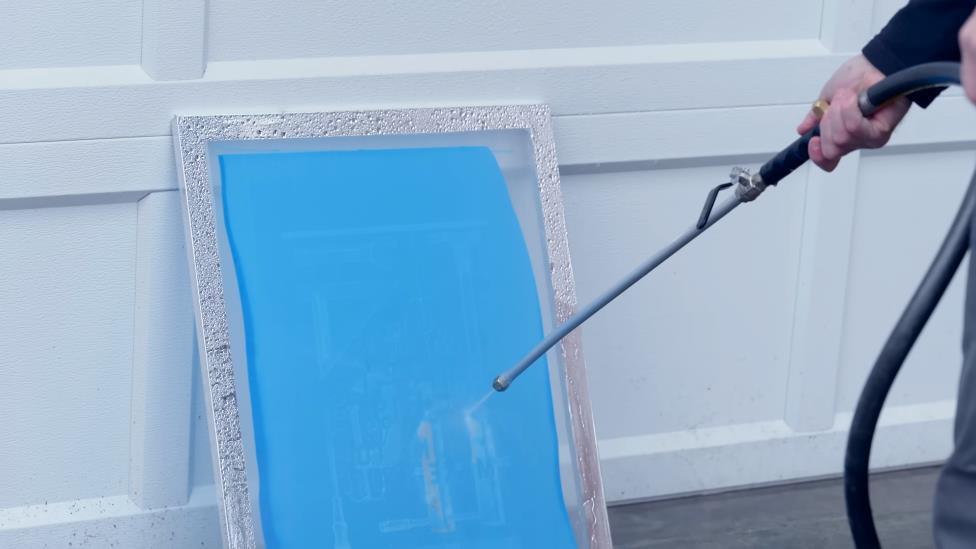
Step 5: Screen Washing
The unhardened emulsion is washed off with water. This leaves a stencil on your screen — and it also serves as the route the ink passes to create the print.
Step 6: Screen Drying
After washing, the screen is thoroughly dried to ascertain that the screen is set for ink application. A thoroughly dried screen is one of the key factors that guarantee a clean print.
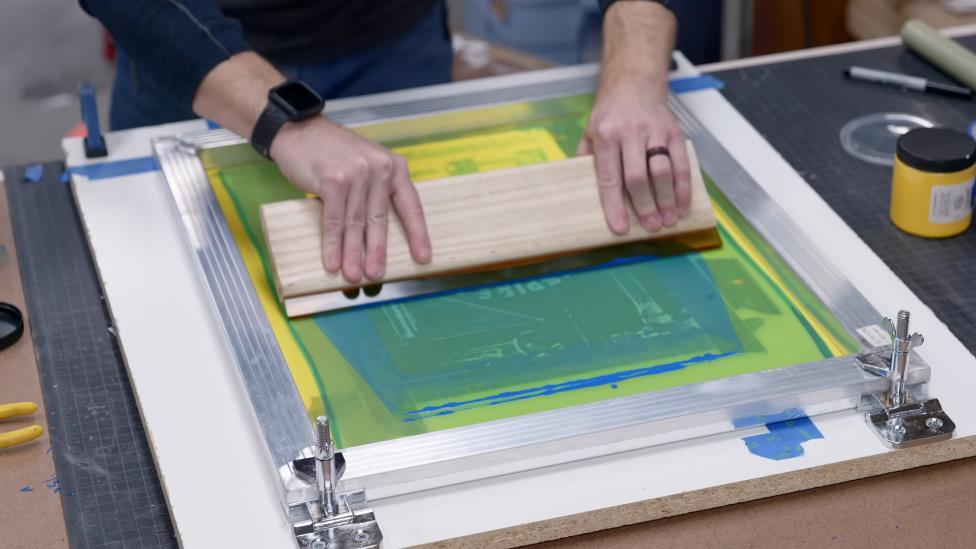
Step 7: Printing
Your fabric should be placed on a printing table, and your printing screen should be carefully positioned above it. Using a squeegee, apply some ink on top of your screen. The printing screen is carefully lowered so it makes contact with the fabric. The ink is forced onto the fabric through the open regions of your stencil. The pushing (or pulling) movement of the squeegee is what exerts the force needed for the printing process.
Pros and Cons of Screen Printing
Pros
- It's versatile and can be used for printing on a broad range of fabrics
- The end product is durable and resistant to washing and wearing
- Bold, high-quality prints are produced
- Good fit for bulk printing production
Cons
- Time-consuming and labor-intensive process
- Not suitable for intricate designs and small details
- Not ideal for single print use
- Each color in the design requires a separate screen
However, screen printing has evolved over the years — and you don't need to go through the cumbersome, complex traditional screen printing process.
Modern screen printing methods require just two tools — the xTool Screen Printer and a laser engraver, such as xTool S1.
The laser engraving process has made the stencil screen creation process much faster and easier. All the labor-intensive processes like emulsion coating, light exposure, washing and drying are not part of the xTool screen printing process. You can get your desired print in a few hours.
Traditional screen printing is lacking when it comes to intricate designs, or printing designs with very small details. However, the xTool Screen Printer is the best fit for these design types. The xTool uses a laser beam that records a precision of 0.01mm — and that can help preserve even the minutest detail of your designs. Your end product will likely be the replica of your design.

Printed items made with xTool screen printer
Heat Transfer Printing on Fabric
Heat transfer printing includes different types such as sublimation printing, direct-to-film(DTF) printing, and vinyl heat transfer. They all require the use of a heat transfer film (or paper) and a heat press during the production process.
The popularity of heat transfer method could be attributed to its efficiency and versatility. It is also a good fit for designs with vibrant colors and intricate details.
Materials and Tools Needed for Heat Transfer Printing on Fabric
The major materials and tools needed for heat transfer printing are:
- Transfer paper
- Printer (depends on the method)
- Heat press
How to Print on Fabric Using Heat Transfer?
Step 1: Design Creation and Preparation
A graphic design software is used for the creation and preparation of the design. At this stage, you will have to adjust the design's color settings, resolution, and size. All of these help in ascertaining optimal products.
Step 2: Printing
Use a printer to print your design onto a transfer paper (or film). Your preferred transfer paper should be dependent on the type of fabric you're printing on. It's also dependent on what heat transfer type you're using.

Step 3: Heat Transfer
At this stage, you will have to position your printed transfer film (or paper) on the fabric. Using the heat iron (or heat press), apply heat to it. During the application of heat, the adhesive on the transfer film (or paper) is activated by the heat. And that causes the design to permanently bond with your fabric.

Step 4: Peeling
After the heat transfer process is complete, you will have to carefully peel the transfer film (or paper) away from the fabric. This leaves your design imprinted onto the fabric. There are cases where you need to cool the transfer papers before peeling.

Related reading:
How to use heat transfer paper?
Pros and Cons of Heat Transfer Printing
Pros
- Ideal for producing vibrant colored prints and prints with intricate details
- Easy process and no advanced technical skills needed
Cons
- The longevity of prints is dependent on the type of heat transfer film (or paper)
Block Printing on Fabric
Block printing is a traditional printmaking method where a carved stamp (or block) is used to transfer dye (or ink) onto fabric and other surfaces. The method is somewhat durable and versatile, and it's one of the techniques that have been used for centuries.

Unlike other methods where specialized equipment (or tools) are needed, block printing on fabric doesn't involve the use of special tools. All that's needed is a carved block, a dye (or transfer ink), and your fabric.
FAQs of Printing Fabric at Home
Can You Print Directly on Fabric?
Yes, you can print directly on fabric. The various ways of doing that are:
- Screen Printing on Fabric
- Digital Printing on Fabric
- Block Printing on Fabric
What Is the Most Durable Way to Print on Fabric?
Screen Printing on Fabric is arguably the most durable way to print on fabric. Aside from screen printing, digital printing on fabric is also a durable way to print on fabric.
For more questions, please join our community to get inspired!

