
How to Engrave Wood: Top 5 Ways Explained
Wood engraving dates back centuries. As per historical archives, early artisans used it to create prints and illustrations for books – A wooden block was engraved and then used as a print stamp for reproducing designs.
Fast forward to today, the essence of engraving has evolved. It has become a popular choice for crafting décor pieces and personalized items.The methods, too, have seen a revolution.
This article is aimed to guide through the top five ways that are being used to engrave wood.
In This Article
- Method 1: Engraving Wood with Laser
- Method 2: Engraving Wood by Hand (Carving)
- Method 3: Engraving Wood with A Dremel (Power Tool)
- Method 4: Engraving Wood with A CNC Router
- Method 5: Wood Burning
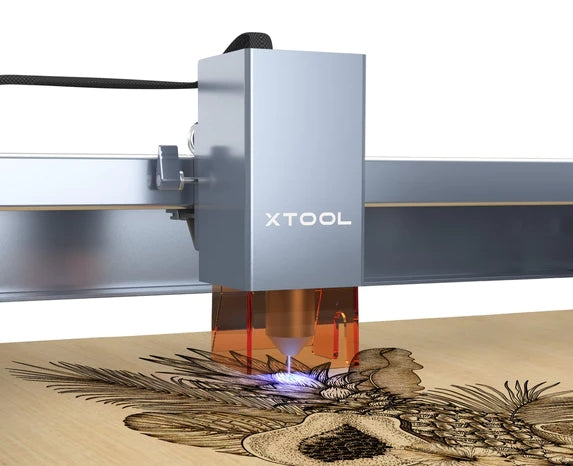
Method 1: Engraving Wood with Laser
Laser engraving represents the pinnacle of modern engraving techniques. With a laser engraver, you can create incredibly intricate designs, including detailed 3D engravings, with unparalleled precision. The laser burns or vaporizes the wood's surface, resulting in clean and precise cuts or marks.
With intuitive software interfaces, laser engraving wood is as simple as printing on a piece of paper. Just design, set, and let the laser do its magic.

Tools for Engraving Wood with Laser
- Laser Engraver: A desktop laser engraving machine, ideally between power 10W to 40W like xTool S1, is perfect for wood engraving.
- Control Software: This allows users to design or import graphics, adjust laser settings like power and speed, and preview the engraving process.
- Design File: A png, jpg or other raster and vector format file.
- Wood Materials: You can choose from natural wood, plywood and MDF depending on your project. There are also a variety of wooden blanks available for engraving, such as coasters, cutting boards, and more.
How to Engrave Wood with A Laser?
Here are a few steps to engrave wood through a desktop laser, such as xTool S1:
- Step 1 - Get A Design File: For simple engraving such as text, you can directly create it in the laser control software. For complex design, create it with your preferred design software or get a pre-made file. You can use our generative AI function, AImake, to make your design.
- Step 2 - Position the Wood in the Laser Machine: Put the wood in the laser machine's working area.
- Step 3 - Position the Design onto the Wood: Mark the area where you want to engrave with S1's pin-point positioning function. The area will be shown on the software. Drag and drop your design within the area.
- Step 4 - Set Laser Parameters: laser engraving is a mix of power and speed. For xTool, we have defined a setting for wooden materials; employ that. Then adjust the focus of the laser head.
- Step 5 - Run the Machine: Initiate the engraving process.
- Step 6 - Finish and Protect (optional): Apply a wood finish, like linseed oil or a clear varnish, to protect the engraved design and enhance the wood's natural beauty.


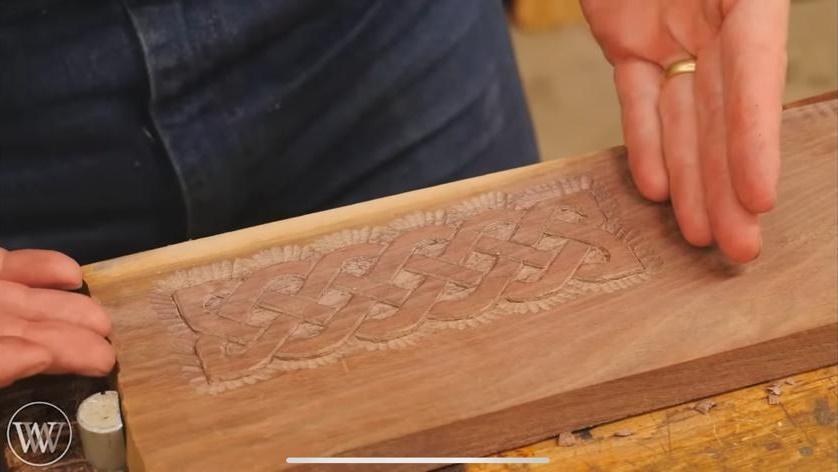
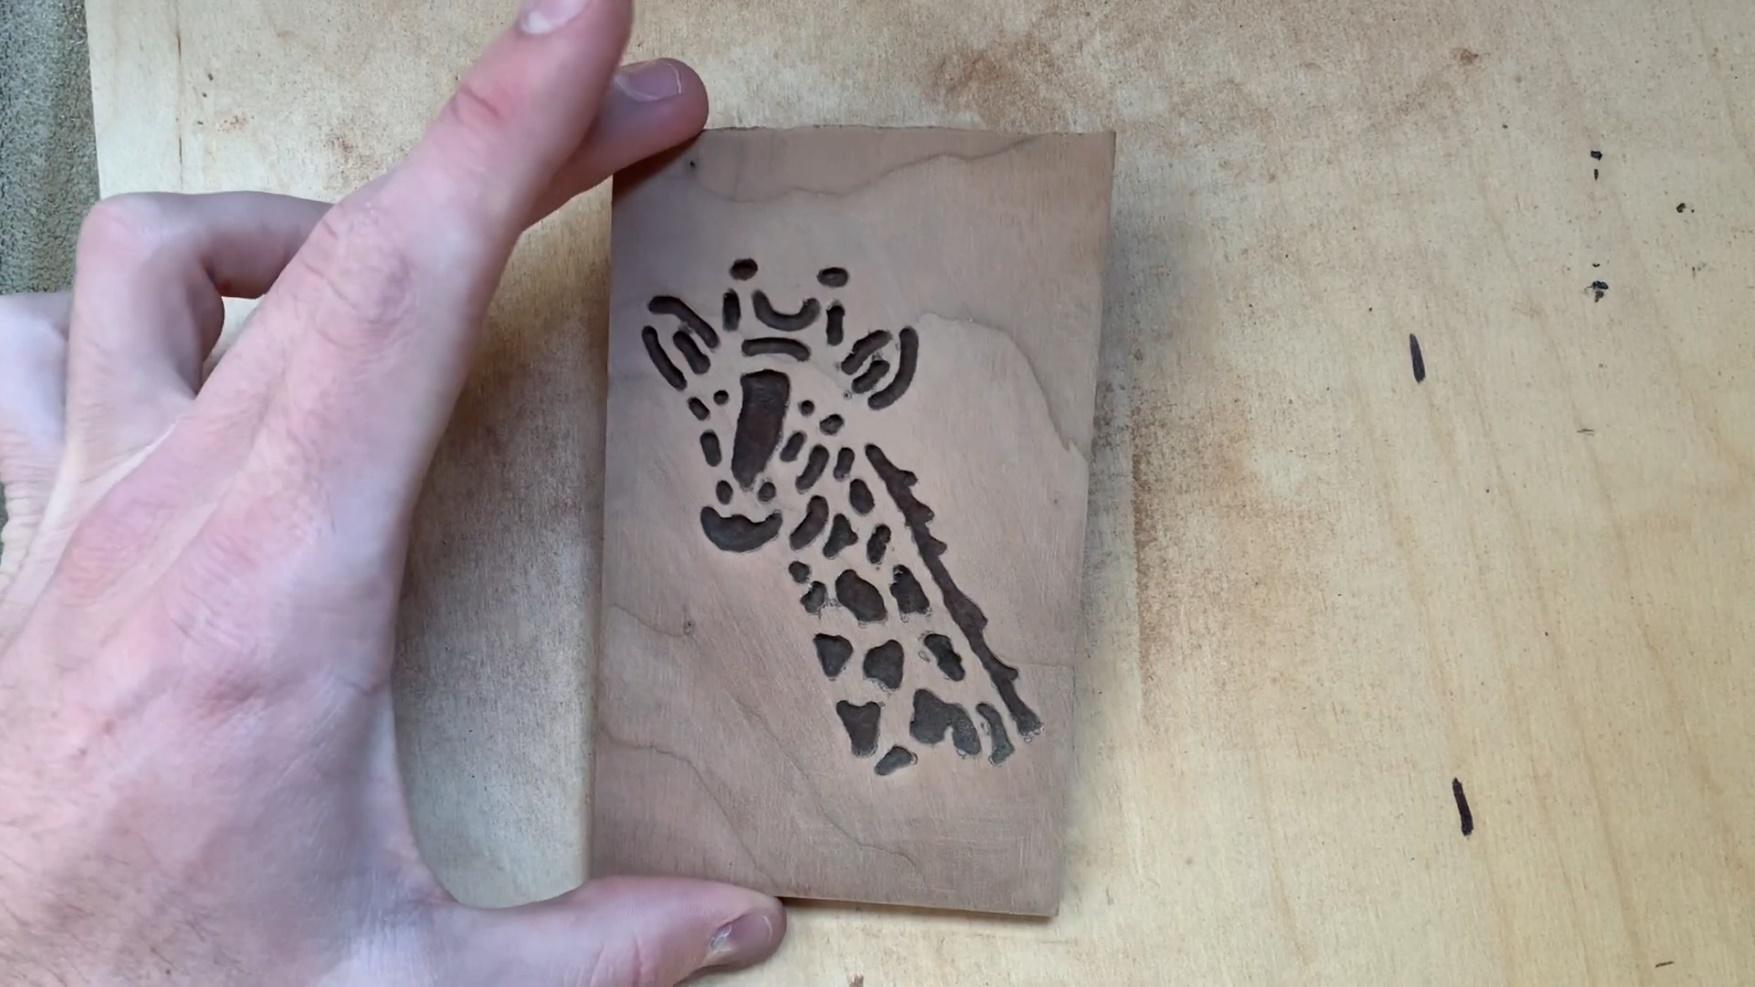
Method 2: Engraving Wood by Hand (Carving)
Wood engraving by hand, commonly referred to as carving, is the most ancient and traditional method of engraving wood. Unlike modern methods that may rely on machinery, hand carving is a purely manual process that requires patience, precision, and a deep understanding of the wood's grain and texture.
Despite modern methods, hand carving is still a popular choice for those who appreciate the authenticity and uniqueness it brings.
Tools for Engraving Wood by Hand
- Chisels: They come in various widths and shapes, from flat to rounded to angular. Their primary purpose is to remove wood in a controlled manner. If you’ve seen a chisel, it has two values imprinted on it, a sweep and width.
- Gouge: It is a kind of chisel with a rounded or U-shaped cross-section. This unique shape makes gouges perfect for hollowing out areas or creating rounded cuts.
- Carver’s Mallet: Unlike regular mallets, a carver's mallet is typically round-shaped. This design evenly distributes the force when struck. The mallet is used to tap chisels and gouges, driving them into the wood. By changing the angle of the chisel and the force of the mallet’s strike, an artisan can control the depth and direction of their cuts.
- Veiner: A veiner is a specialized type of gouge with a distinct V-shaped blade. It is designed to create veins or fine lines in a carving. This adds sharp and intricate details that emphasize certain design elements.
Sweep values range from 1 to 11, and define the curvature. Smaller values (i.e. 1) indicate a flat chisel while the later ones indicate a more rounded curvature. The width of the chisel determines the size of the cut.
How to Engrave Wood by Hand?
To engrave wood by wood with a set of chisels, follow this procedure:
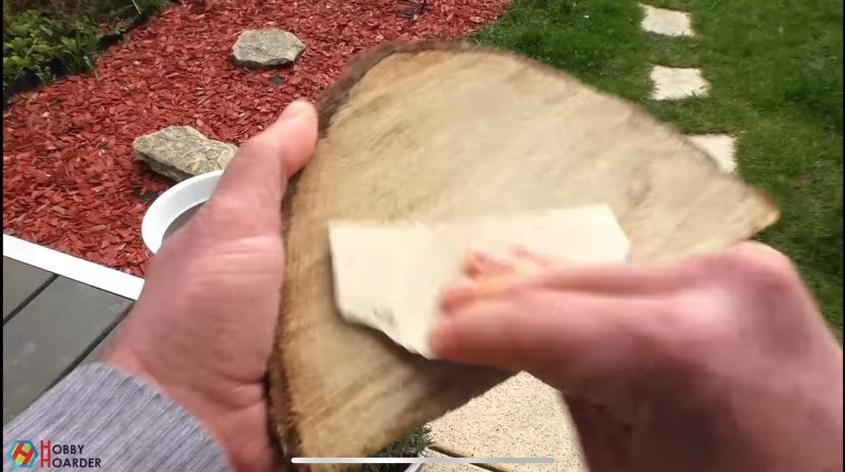
- Step 1 - Prepare the Wood Surface: Sand the wood using progressively finer grits of sandpaper, starting from coarse to fine, to achieve a smooth surface. If it’s already smooth, skip this step.
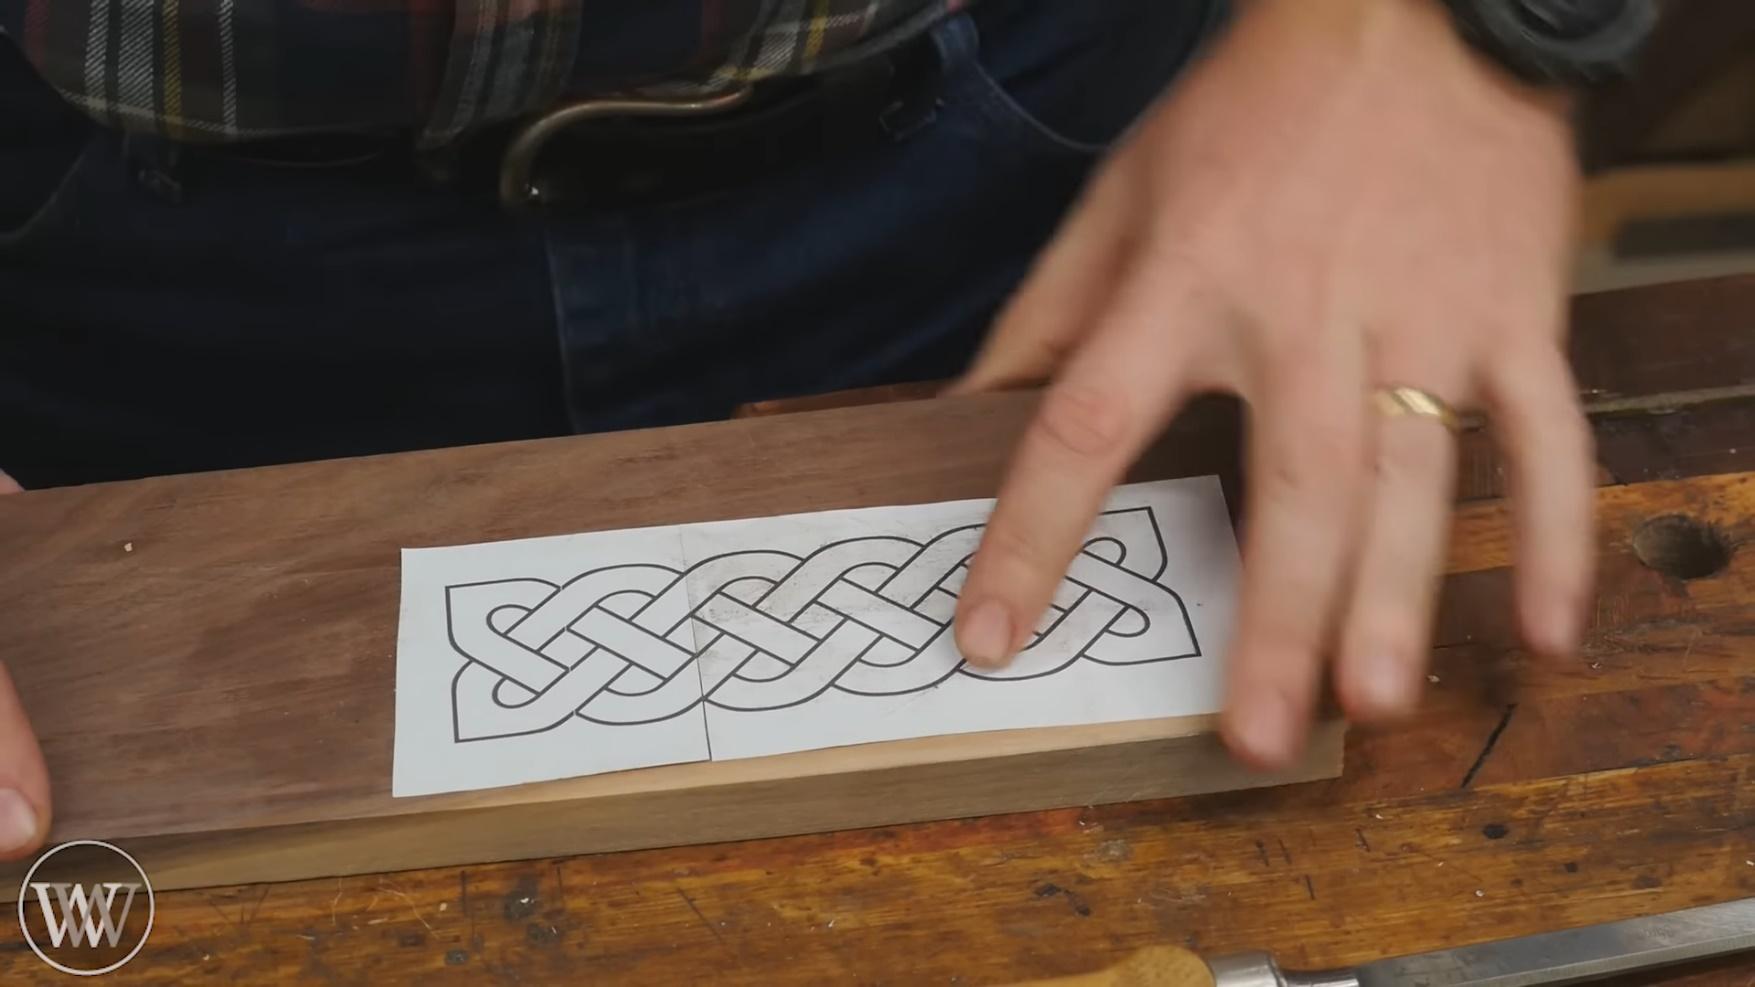
- Step 2 - Transfer or Sketch the Design: If you have a specific design in mind, sketch it onto the wood using a pencil. Alternatively, you can print it on paper, cut it, and glue it directly onto the wood.
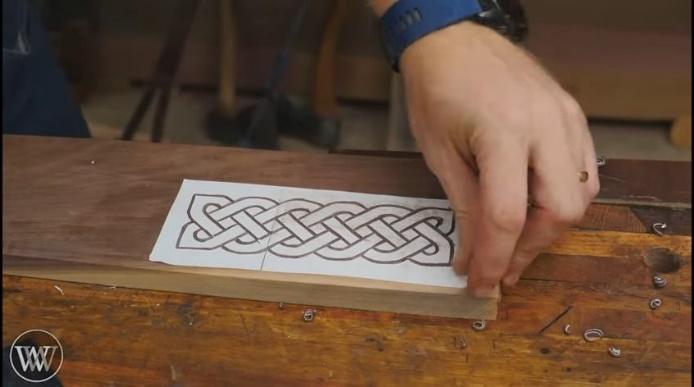
- Step 3 - Begin Outlining: Hold the chisel or gouge at an angle and use the carver's mallet to gently tap on it, following the design lines. Just outline the curves and straight patterns of the design.
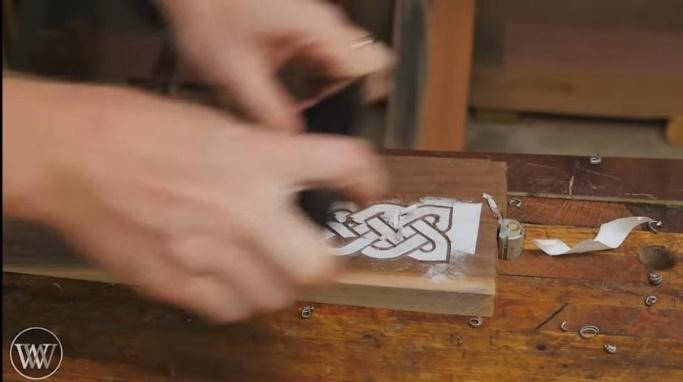
- Step 4 - Remove the Paper: Once you’ve fully outlined the design, remove the design paper you pasted with a card scraper.
- Step 5 - Deepen the Engraving: Now, it’s time to engrave deeper. For a more pronounced design, go over the carved lines multiple times. Use liners for V-shaped cuts and gouges for curved or scooped-out designs.
- Step 6 - Clean the Surface: Brush away wood shavings and dust using a soft brush. You can also wipe the surface with a slightly damp cloth to remove any remaining debris.
©WoodbyWrightHowTo – YouTube

Method 3: Engraving Wood with A Dremel (Power Tool)
Much like the traditional hand carving method, this method follows a similar approach but with a modern twist. Instead of relying solely on manual force, artisans use electrically powered tools to engrave the wood.
Power Tools for Engraving Wood
Some power tools commonly used for engraving into wood are:
- Dremel Rotary Tool: A versatile electric tool known for its high-speed rotation. It comes with various attachments, including engraving bits, grinding stones, and sanding drums. The tool’s compact size and precision make it ideal for detailed wood engraving, especially in tight or hard-to-reach areas.
- Power Chisel: It is an electrically driven version of the traditional hand chisel. It doesn’t require manual force, instead, it operates using either a motor or pneumatic pressure. With interchangeable tips and adjustable speed settings, the power chisel can make quick work of both broad cuts and intricate details.
- Router: It is primarily used for hollowing out an area in a piece of wood. However, with the right bit, it can also be used for engraving. It is particularly used for creating large engravings or patterns on wooden surfaces.
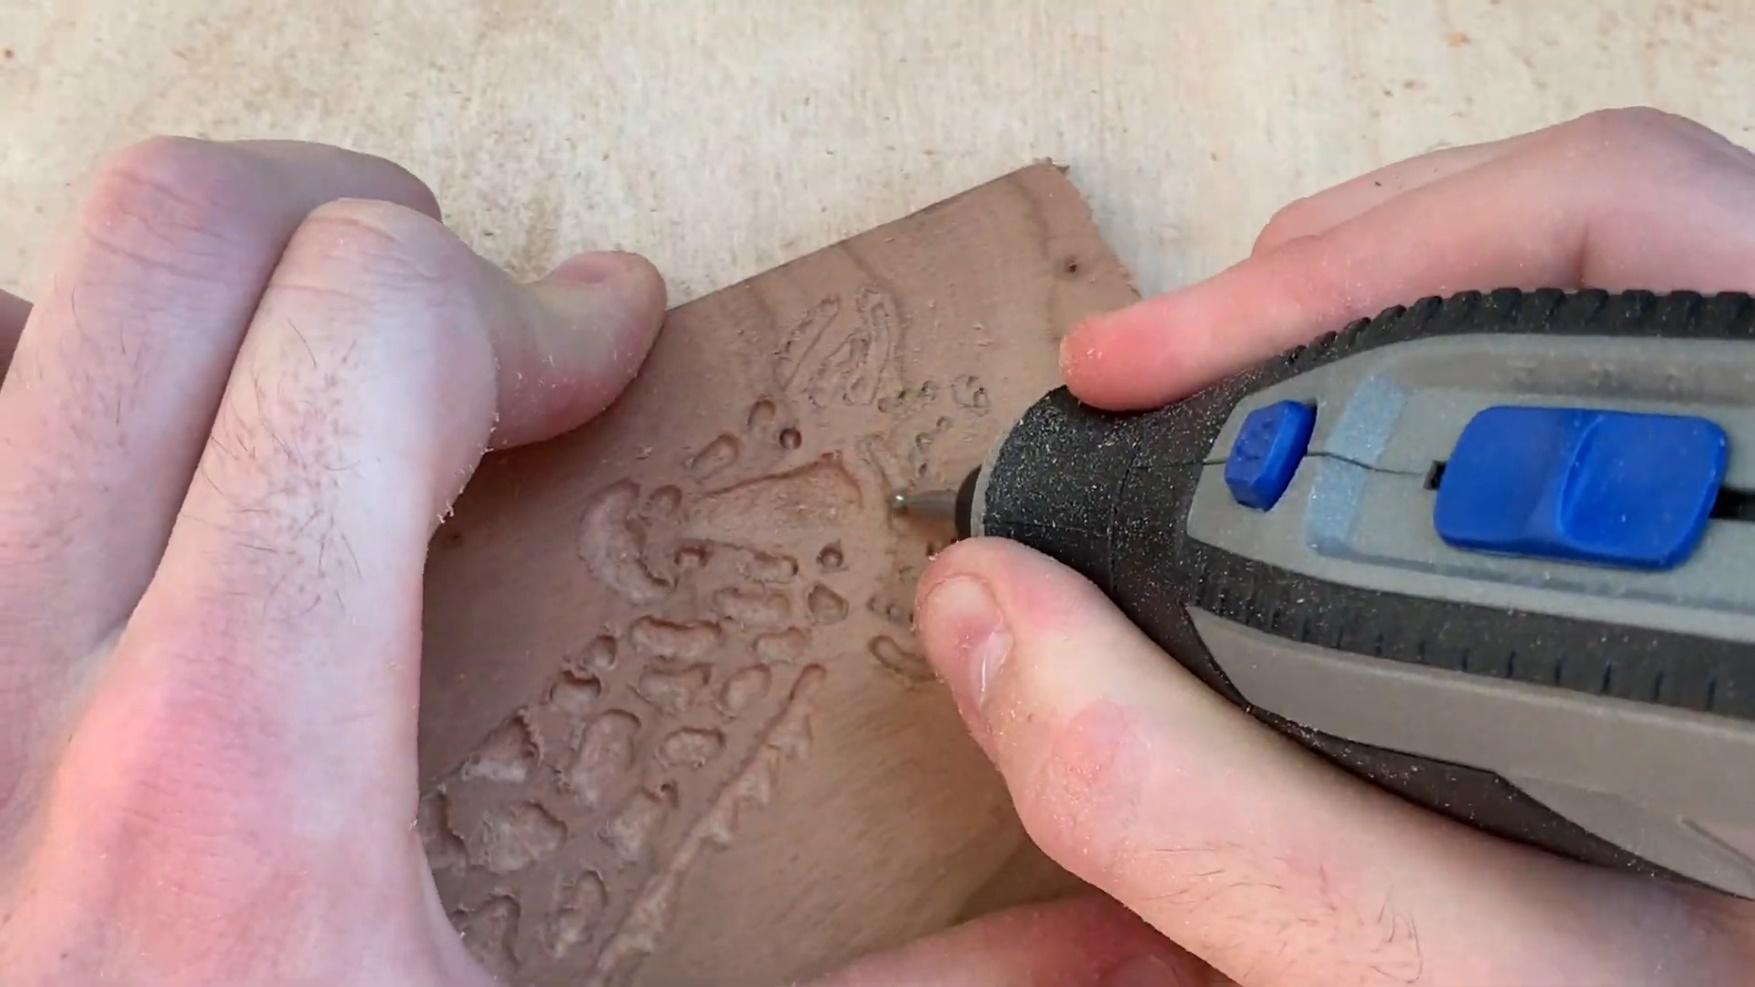
How to Engrave Wood with A Dremel?
Dremel is a common power tool for engraving wood. Here’s how you can use it to etch patterns:
- Step 1 - Preparation: Opt for a smooth, flat piece of wood. Softer woods like pine or basswood are ideal for beginners as they engrave more easily.
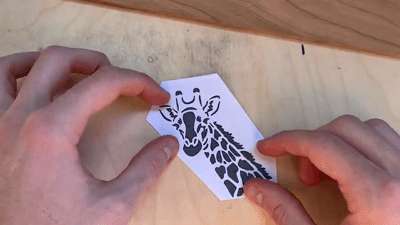
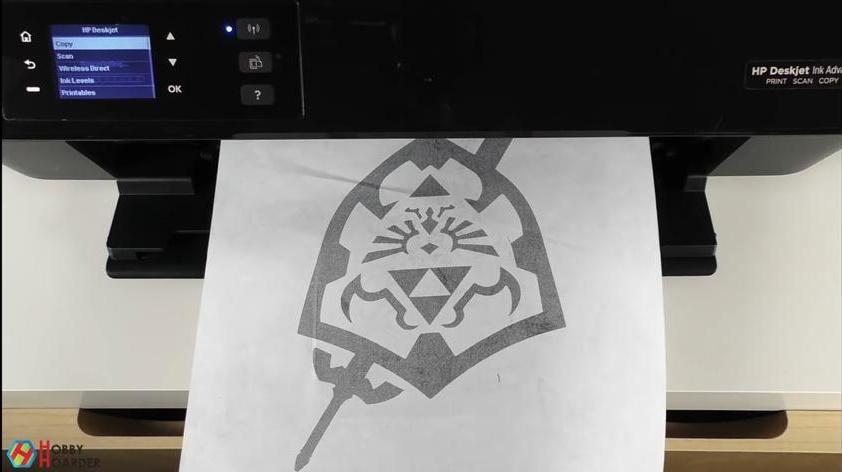
- Step 2 - Get a Printed Design: You need a black and white printed design to serve as the blueprint for engraving.
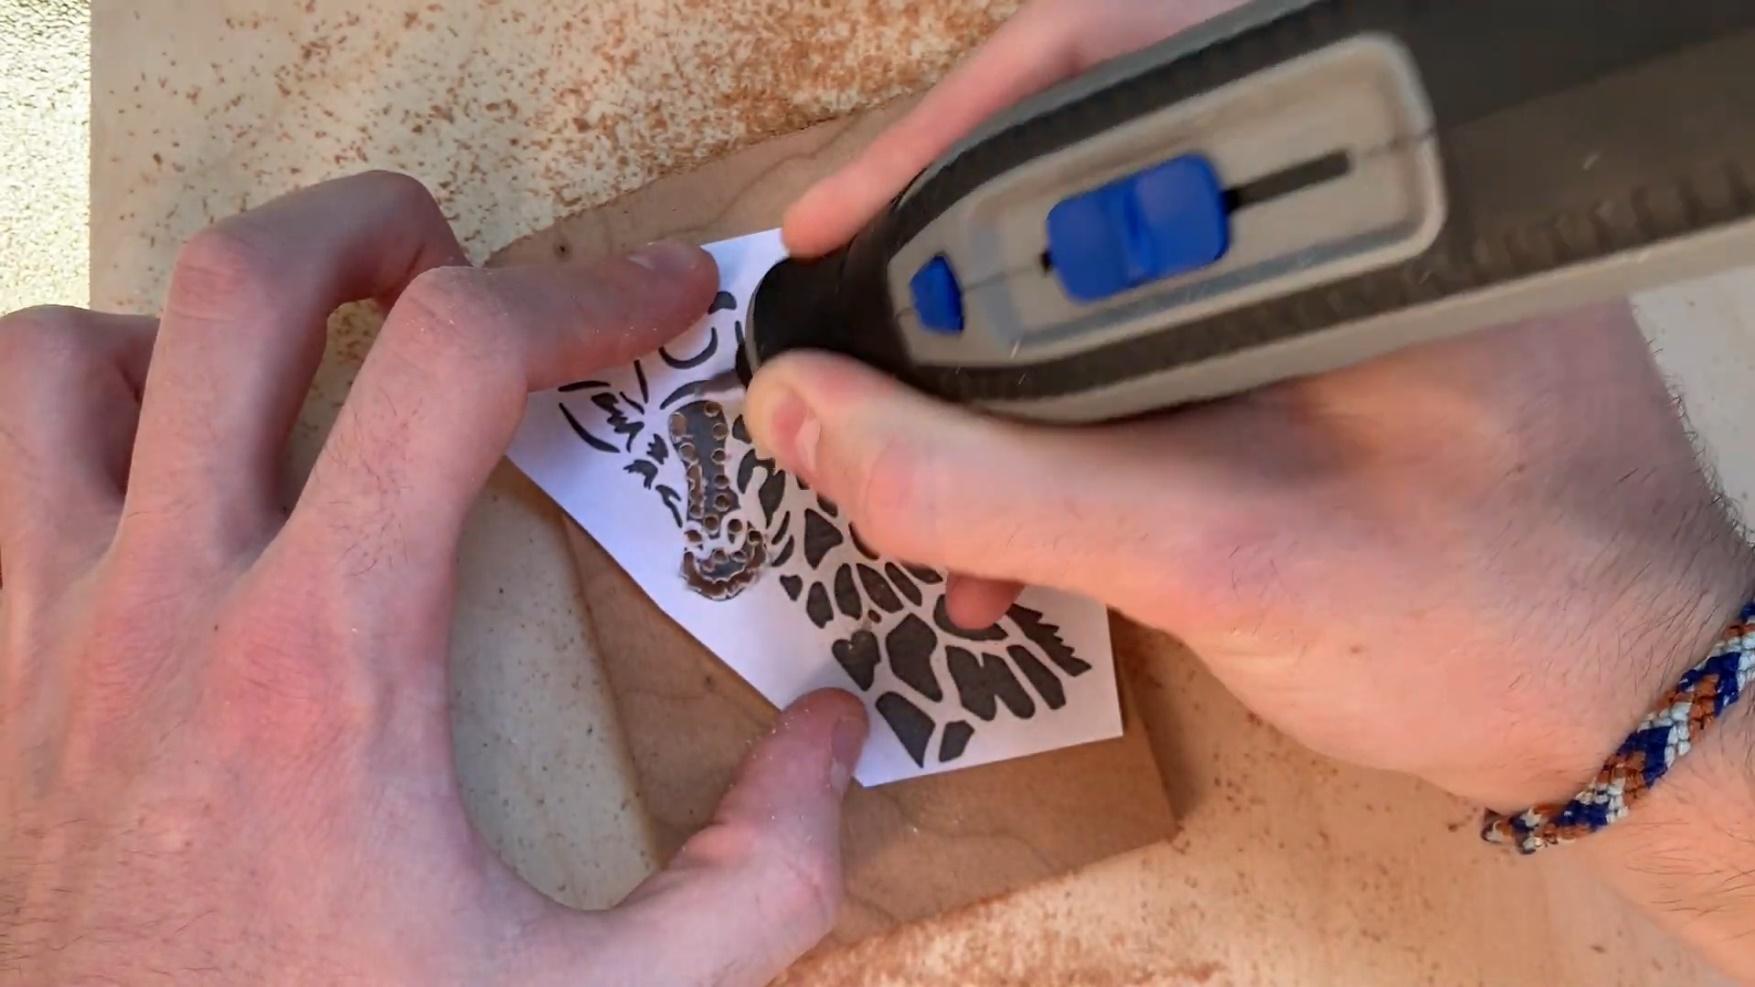
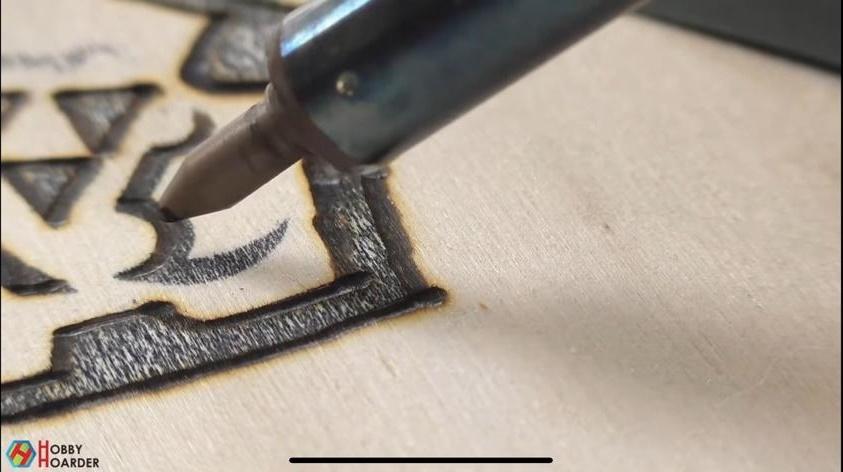
- Step 3 - Transfer the Design: Place the printed design on the wood where you want the engraving. You may use carbon paper to transfer the sketch or directly use the Dremel with a fine-pointed bit for outlining. Create small holes to outline.
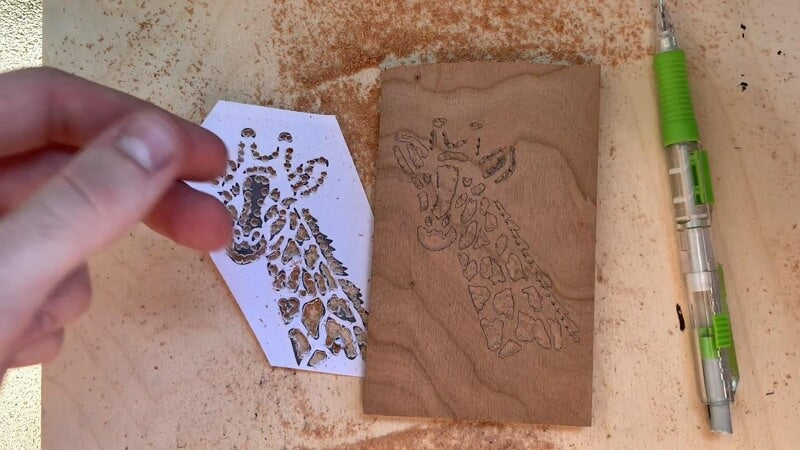
- Step 4 - Pen Outlining: Once you have made the initial outline with the Dremel, go over it with a pen. Connect all the holes and form a design that looks similar to the one you printed on paper.
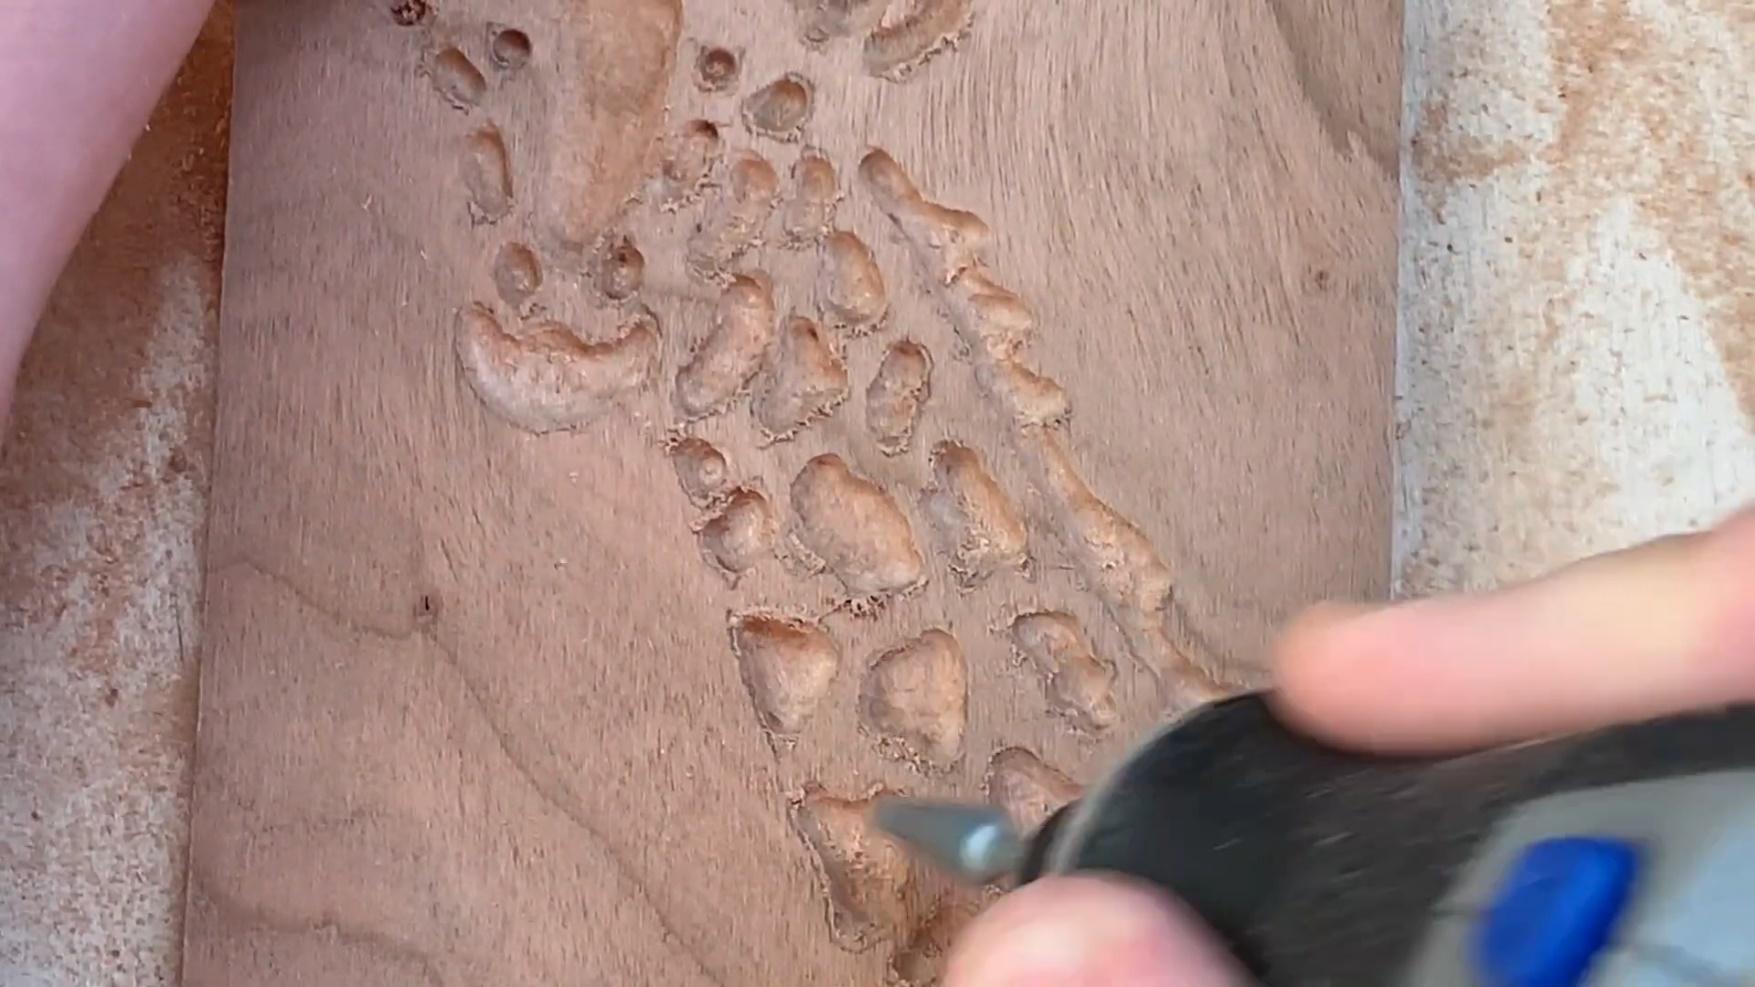
- Step 5 - Engrave with the Dremel: Return to the Dremel and carefully engrave along the pen-outlined design. The depth of the engraving is up to you, but ensure it’s consistent.
- Step 6 - Sand Inside Engraving: Once the engraving process is complete, replace the existing Dremel bit with a sanding bit. Gently sand inside the engraved areas to smooth out rough or uneven spots.
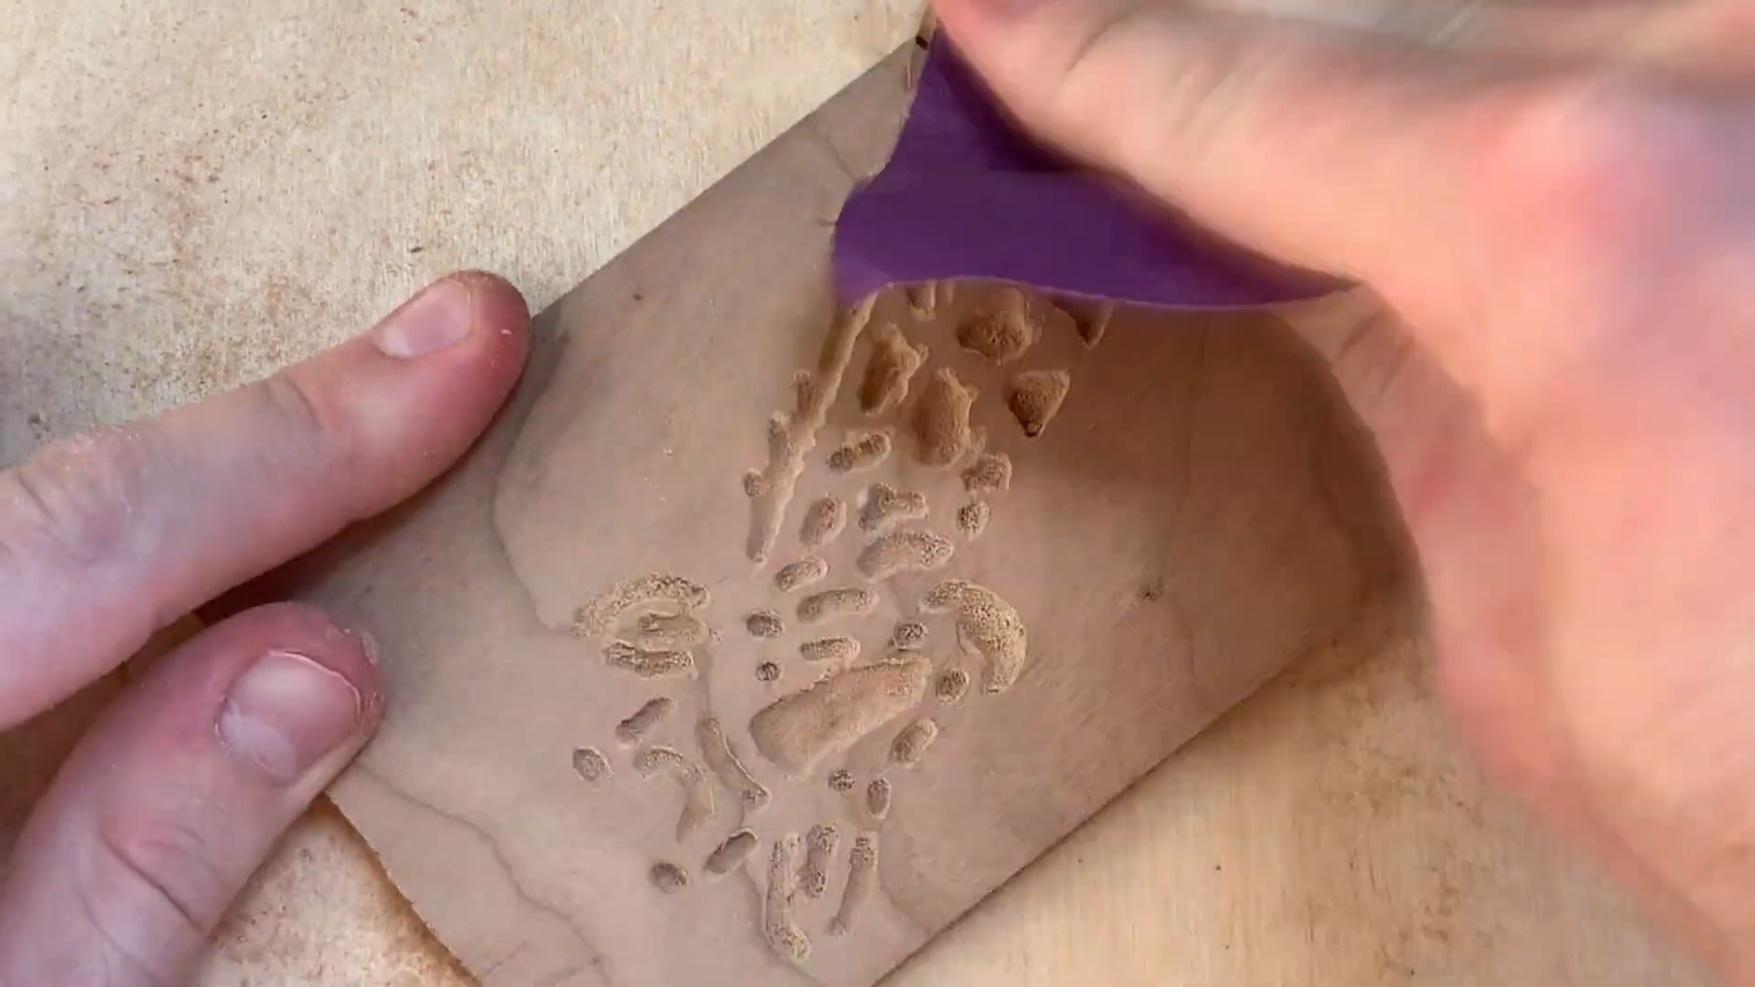
- Step 7 - Surface Sanding: The outside does need to be smoothened. For that, use a fine grit sandpaper. Once you’re done, invert the piece and shake it a bit to remove that wood dust.
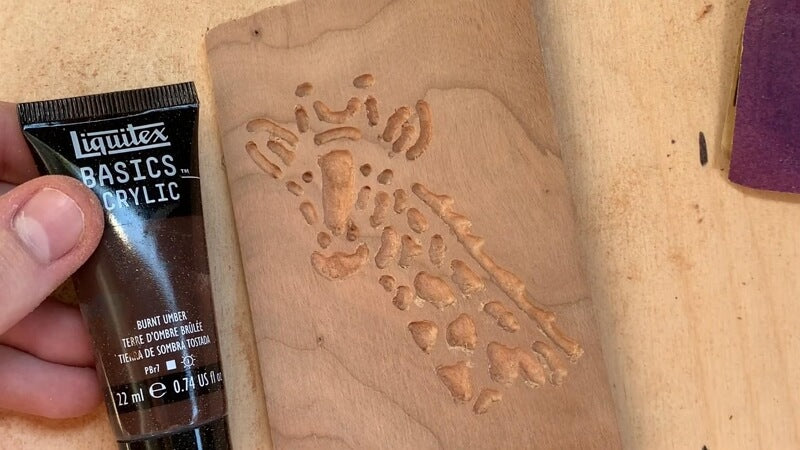
- Step 8 - Add Acrylic Paint: Select an acrylic paint color that complements the wood (brown paint would be a fine choice). Carefully paint inside the engraved design. Don’t worry about being too neat; any excess will be sanded away.
- Step 9 - Remove Excess Paint: Once the paint is dry, take a fine-grit sandpaper and gently sand the surface. This will remove any paint that’s outside the engraved areas, giving a clean look.
©Log’s Engraving Club – YouTube
Method 4: Engraving Wood with A CNC Router
CNC (Computer Numerical Control) wood engraving is a fusion of traditional woodworking and modern technology. Although it shares similarities with laser engraving in terms of computer-controlled movement, the CNC process is distinct in its approach.
It is a contact process, in which a specialized tool sinks into the wood to carve out designs. The depth, speed, and path of the router bit are all precisely controlled by computer software.
Tools for Engraving Wood with A CNC Router
- CNC Machine: The primary equipment that uses computer-controlled movements to guide the engraving process on wood.
- Router Bits: They are specialized tools that come in various shapes and sizes for different engraving effects. They carve designs into the wood as directed by the CNC machine.
- Clamps & Hold-Downs: Clamps are used to securely hold the wood in place during the engraving process to ensure precision and safety.
- Safety Gear: This includes safety goggles, ear protection, and dust masks to protect the user from potential hazards during the engraving process.
How to Engrave Wood with A CNC Router?
- Step 1 - Design Preparation: Begin by using CAD (Computer-Aided Design) software to create your design. This software allows you to create detailed and intricate patterns suitable for engraving. Save the design in a format compatible with your CNC machine, typically a .dxf or .svg file.
- Step 2 - Setting Up the CNC Router: Secure the wood piece onto the CNC bed using clamps. Ensure it’s perfectly level to prevent any inconsistencies during engraving. Then, choose the appropriate router bit for your design. V-bits are ideal for detailed engravings, while straight bits are suitable for broader cuts.
- Step 3 - Machine Calibration: Set the starting point by moving the router bit to the wood's surface and setting this position as the 'zero' or starting point in the CNC software.
- Step 4 - Dust Collection: If your CNC machine has a dust collection system, activate it to collect wood debris during the engraving process.
- Step 5 - Starting the Engraving Process: Load your design file into the CNC machine's control software and start the engraving process. The machine will follow the design, carving it into the wood.
- Step 6 - Post-Engraving: Once the engraving is complete, remove the wood piece from the CNC bed. Brush away any wood chips or dust. Lightly sand the engraved area to smooth out any rough edges or raised grain. Finally, apply a wood finish or sealant to protect the engraved design and enhance the wood’s appearance.

©RogerWeb – YouTube


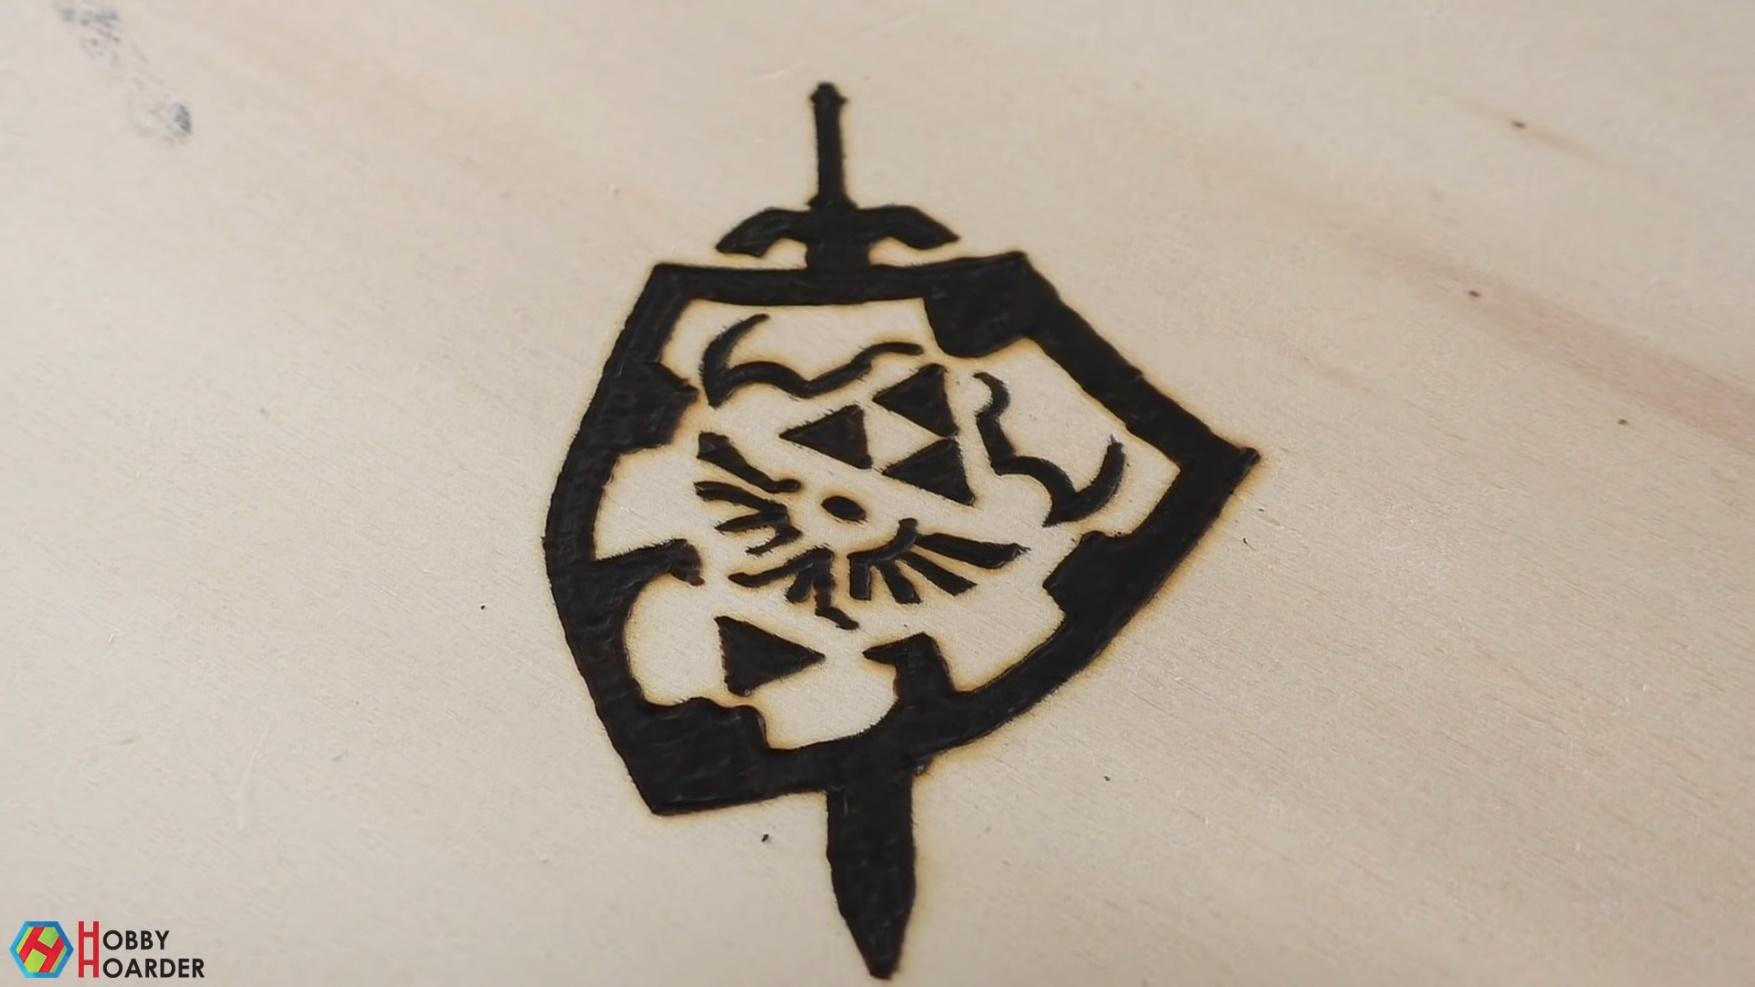
Method 5: Wood Burning
Wood burning or pyrography is the art of decorating wood by burning designs into its surface using a heated tool. From intricate patterns to portraits and landscapes, wood burning allows for a wide range of artistic expressions. The resulting designs have a rustic, etched appearance that highlights the natural grain of the wood.
Tools for Wood Burning
- Wood Burning Pen: It is the key tool used in pyrography. It heats up to different temperatures, allowing artists to burn designs onto the wood's surface.
- Interchangeable Tips: These are attached to the wood-burning pen and come in various shapes and sizes. Each tip creates different effects, from fine lines to shading and textures.
- Sanding Paper: It helps in preparing the wood surface as the process requires a smooth surface, free of any splinters or rough patches.
- Cleaner Brush: A small brush to clean away any residue or charred wood particles from the engraved design.
How to Burn Wood?
- Step 1: Use sandpaper to smoothen the wooden surface, Make sure it’s free from any coatings or finishes and devoid of moisture.
- Step 2: Decide on a design and lightly sketch it onto the wood using a pencil. This will serve as a guide during the burning process. Alternatively, you can print a design on sticker paper and transfer it directly onto the wood.
- Step 3: Work in a well-ventilated area, as wood burning can produce smoke and fumes. We recommend you use an exhaust fan. Also, wear safety goggles to protect your eyes from any flying debris and a dust mask to avoid inhaling fumes.
- Step 4: Plug in your wood-burning tool and allow it to heat up. Most tools will have an indicator light to show when they're ready.
- Choose the appropriate tip for your design. There are various tips available, from fine points for detailed work to broader tips for shading.
- Step 5: Hold the wood-burning tool like you would a pencil, but ensure your hand is steady. Apply consistent pressure as you trace over your design.
- Use a combination of dots, lines, and shading to bring your design to life. The longer you hold the tool in one spot, the darker the burn will be.
- Some wood-burning tools allow you to adjust the temperature. Use a lower setting for lighter shades and a higher setting for darker shades. For deeper shades, go over the same area multiple times.
©Hobby Hoarder – YouTube
For more questions, please join our community to get inspired!

