How to Design for Laser Cutting?
The journey to bring your ideas to life begins with design. It is a prerequisite for creating something new. In the past, when hand tools were used, we sketched our visions on paper. Today, manual designs still serve as a starting point for most designers. However, when it comes to utilizing machines, a digital design is necessary.
Laser cutting is no exception. Every laser cutter requires a design file to operate—a file that contains all the intricate details and precise information about what needs to be cut. Factors such as line width, color, shape, and arrangement are crucial. Therefore, this file must be created with care.
This article aims to teach you how to design for laser cutting, covering file formats, software tools, and everything else you need to turn your creativity into reality.
In This Article
- Design Considerations for Laser Cutting
- Design Workflow for Laser Cutting
- FAQs on Designing for Laser Cutting
- Conclusion
Design Considerations for Laser Cutting
Design is a critical phase that needs to be done with extreme care. This is only achievable if you’re aware of all the technical intricacies and design tools. When designing laser cutting files, keep these three aspects in mind:
Design Software
Design software is a tool to digitally create a copy of your hand-drawn design. To make designs for laser cutting, any notable graphic design software can be used.
The popular options are Adobe Illustrator, CorelDraw, and AutoCAD. The former two are used for creating scalable vector format graphics while the latter is used for making drawing format graphics. These two formats are compatible with most laser cutters.
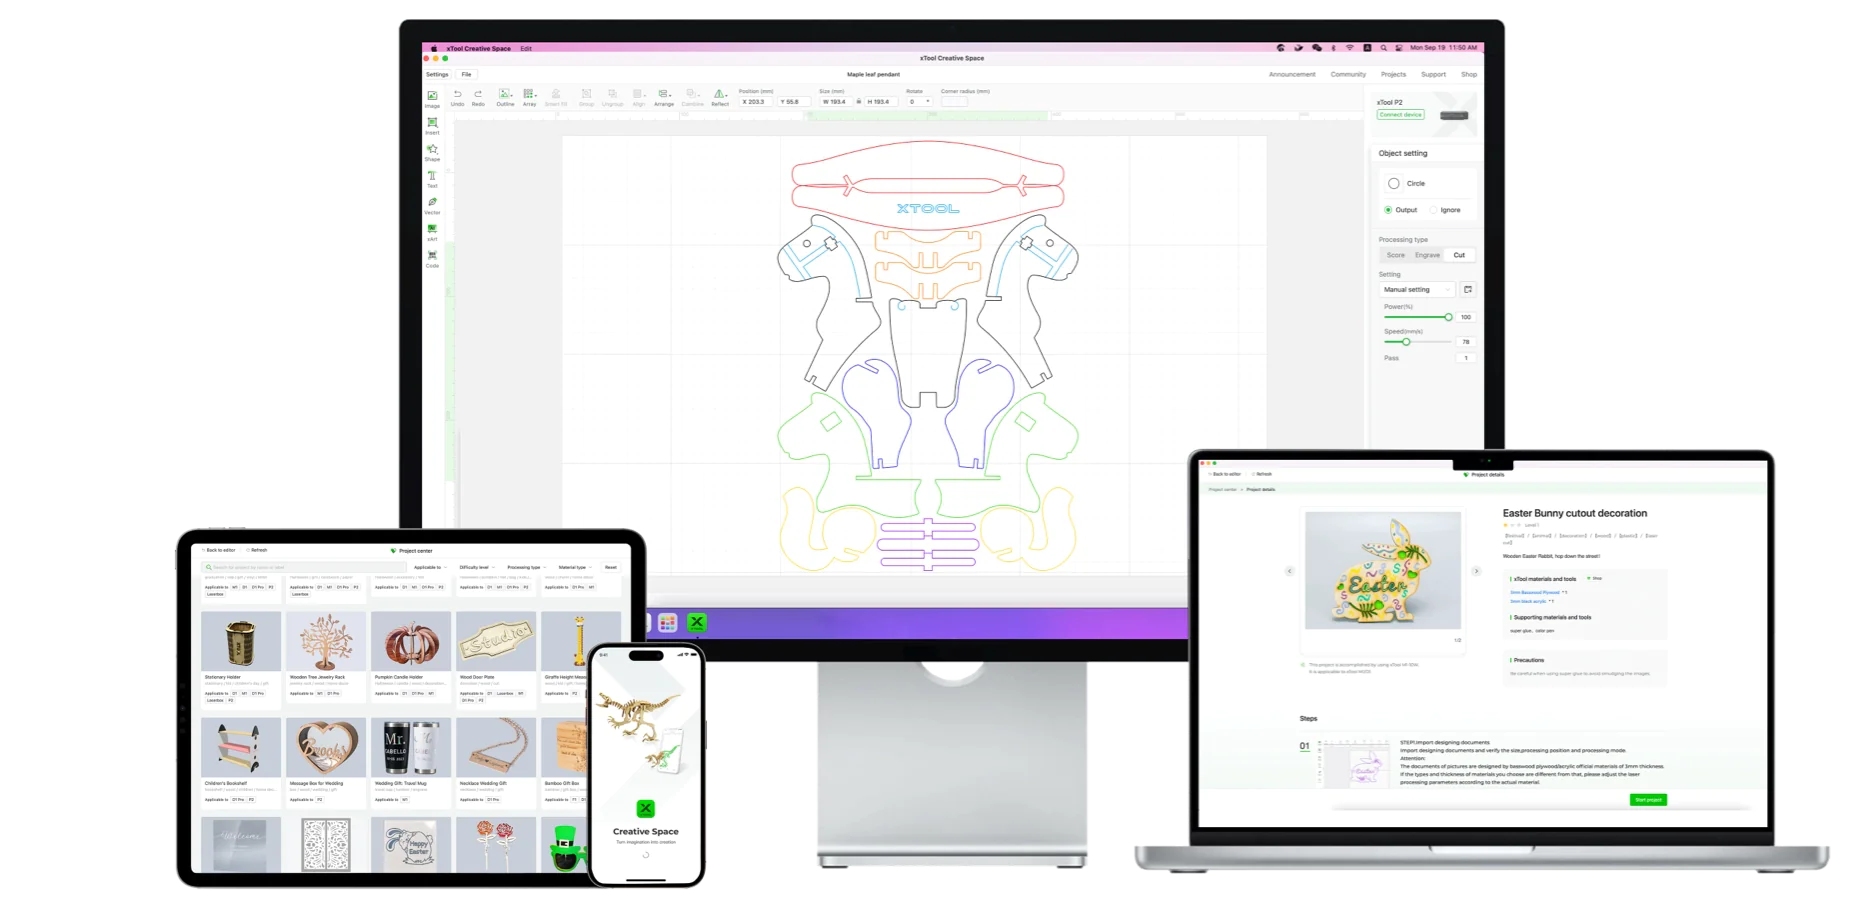
For simple designs, laser cutter software, like xTool Creative Space (XCS) can also be utilized. You can create simple graphics, right before cutting, within the control software.
Laser Cutting File Types
The design images typically fall into two categories: raster and vector.
Raster images are composed of a grid of individual pixels, each pixel assigned a specific color. This composition makes them perfect for capturing the subtlety and complexity of photographs. However, resizing them larger than their original dimensions can lead to a loss in clarity. They are suitable for laser engraving but not for laser cutting.
Vector Graphics are created using paths or strokes, defined by mathematical equations, which outline shapes and designs. Vector images can be scaled to any size without any loss of image quality. They are ideal for laser cutting jobs.
Two vector formats, in particular, are recommended for laser cutting:
- DXF (Drawing Exchange Format): It’s widely used in CAD (Computer-Aided Design), and favored for its ability to handle complex and precise engineering drawings.
- SVG (Scalable Vector Graphics): SVG files are ideal for graphic design projects due to their compatibility with many graphic design software and web applications. They maintain high-quality details when scaled and are perfect for designs that include text, logos, and artwork.
Design Elements
Every detail in the vector file matters. Understanding what they mean and how the laser cutter interprets each can help you design the files properly.
Lines vs Fills: Lines and fills are two distinct elements. Lines have specific widths and define the cutting path. The laser cutter follows these paths precisely to create shapes and contours.
On the other hand, fills—areas enclosed by lines and filled with color or patterns—are interpreted by the laser cutter as regions for engraving. The laser moves back and forth across these areas, removing material layers to create the design.
Kerf: Kerf refers to the width of the material that is removed by the laser beam during the cutting process. It is a critical consideration for precision designs because the laser essentially vaporizes a thin line of material, which can affect the exactness of the final dimensions of a part. When designing, ensure you have adjusted all dimensions according to the kerf.
Minimum Line Width: Line widths also convey a specific meaning. They tell whether the machine needs to cut, engrave, or score. This width is often determined by the laser's power and precision capabilities. For example, a line width of 0.2pt might be used for cutting, while a thicker line, such as 1pt, might indicate engraving.
Textual Information: The laser cutter may not process an active text box directly. You have to convert that into a shape/cutting path before the machine processes it.
Design Workflow for Laser Cutting
Embarking on a laser cutting project involves more than just operating the machine; it begins with a thoughtful design process. Here’s a simple workflow for making laser cutting designs:
Finding Inspiration
Don’t jump directly to the graphic design software. First, take a moment to gather ideas and sketch your design. You can take inspiration from different online communities and design forums. Check out some of the free laser projects already available.
xTool Projects is one of the communities where xTool users share their creative projects. You can take inspiration from these designs, and formulate one for yourself.
Create Your Design in Software
After a rough sketch on paper, start creating that design on the graphic design software. CorelDraw, Adobe Illustrator, and XCS are simple options. Remember to include all details and make sure the designs exactly match your manual design.
Prepare for Cutting
You can take care of technical aspects during the design creation. However, if not done, do it after you import the file into laser control software. Ensure all lines are set to “cut” (not engrave) in the laser cutter software. Make sure the final file is clean with no intersection lines and open shapes.

FAQs on Designing for Laser Cutting
How to Convert an Image to a Vector for Laser Cutting?
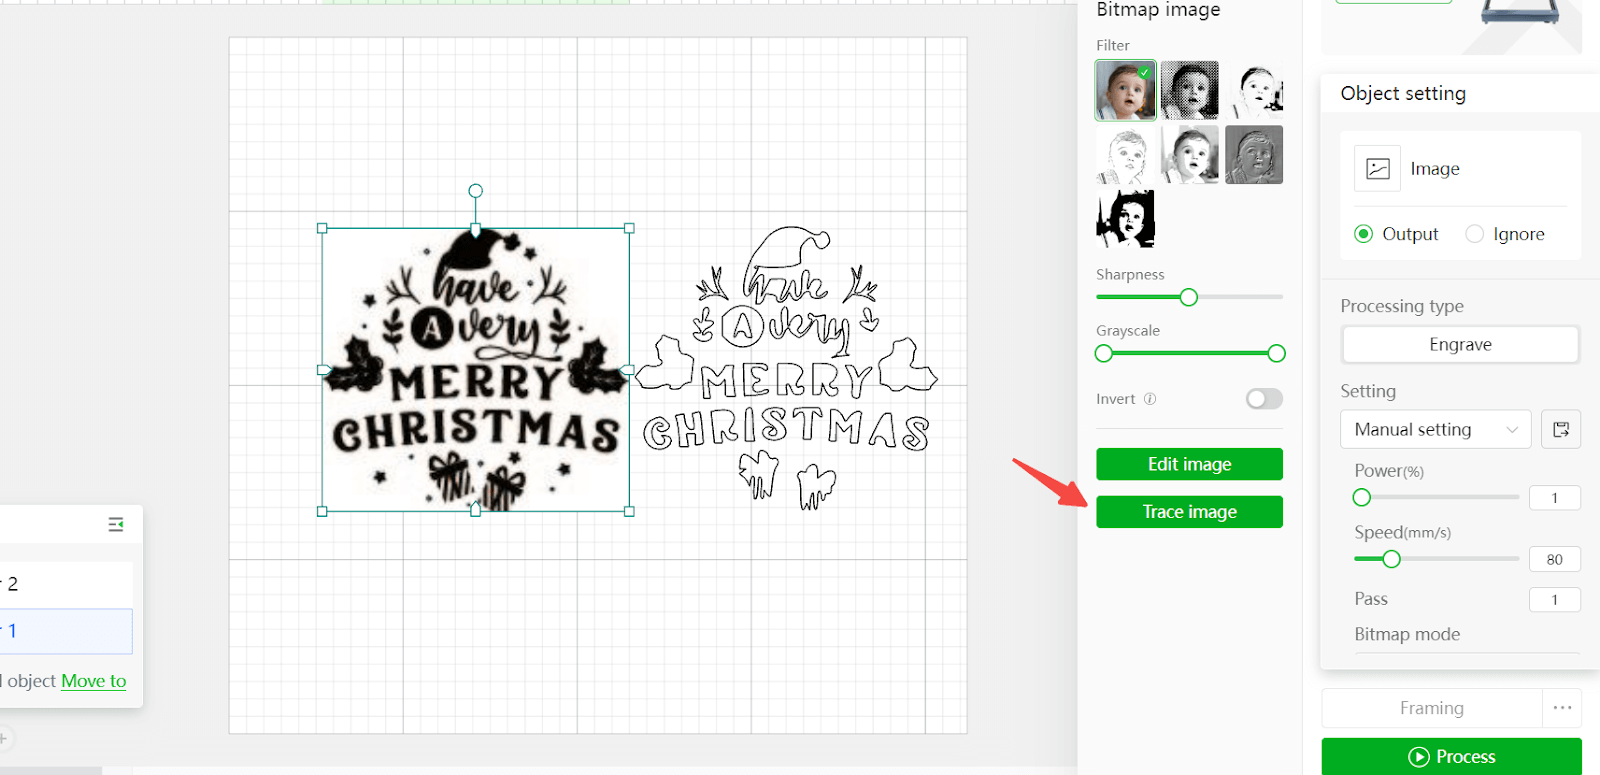
XCS has a trace image function for tracing the outline of an image. After importing the image file, select ‘Trace Image’ from the list of formatting options.
How Do You Get Designs for Laser Cutting?
You can either make your design in a graphic design software or use the free laser cut files available online. xTool Projects is a large resource for getting designs for laser cutting.
How Do You Send a Design to a Laser Cutter?
Connect your laser cutter to a PC and run laser control software. Import the design file in the laser control software and use it for cutting the material.
What Format File is Needed for Laser Cutting?
Laser cutting requires vector files. SVG and DXF are two of the common vector formats commonly used in laser cutting designs.
Conclusion
Design is the most critical phase in any manufacturing process. Laser cutting is no different – every design element conveys a specific instruction to a cutter. Creating this design requires attention to detail and knowledge of technicalities. If you want to bypass those complexities, simply download the free laser cut files available online.
For more questions. Please join our Facebook group to get inspired!

Related Posts

How To Make Stickers At Home: Ideas And Small Business Inspiration
UV DTF Transfers for Small Businesses: Costs, Turnaround & Quality